24 Delicious Make Ahead Camping Meals for Easy Camp Cooking
Good food is one of our favorite parts of a camping trip. A hot breakfast with coffee in the morning, something easy for lunch, and a genuinely satisfying dinner after a day outdoors can become as much a part of the trip as the camping itself.
That said, camping food can be so much more than hot dogs and whatever is easiest to chuck on the grill. The trick is doing more of the prep at home before you leave.
We’ve put together 24 make-ahead camping meal ideas, ranging from fully cooked meals you simply reheat to easy meal kits you can prepare ahead and finish fresh at camp.
These twenty-four meals are organized by how much is left to do when you arrive, starting with the ones that only need reheating. Each gives you quantities, the steps to do at home, what happens at camp and roughly how long it will take.
If you want a broader mix of recipes instead, including cooking from scratch at the campsite, our list of easy camping meals covers those too.
This post contains affiliate links. As an Amazon Associate, The Avid Campers earns from qualifying purchases. If you buy through one of our links, we may earn a small commission at no extra cost to you.
Food Safety in One Place
Rather than repeating this under all twenty-four meals, here is a quick rundown of what you’ll need to know and plan for beforehand in terms of food safety.
Prepping ahead adds three steps that ordinary camp cooking does not have, which are cooling, freezing and thawing, and each one is worth getting right.
Be sure to cool any cooked food quickly and get it into the fridge or freezer promptly. USDA guidance recommends dividing large batches into shallow containers so they cool more quickly, then refrigerating promptly rather than waiting for food to reach room temperature. Hot food can go into the fridge. Perishable food should not be left out for more than two hours, or more than one hour when the temperature is above 90°F (32°C).
If you’re planning a longer trip and need some meals to remain fully frozen for later, keep them at 0°F (-18°C) or below to remain frozen. For food that only needs to stay refrigerated, your cooler should remain at 40°F (4.4°C) or below.
If you want a frozen meal to thaw gradually, you can move it from your frozen storage into a refrigerated cooler or section that stays at 40°F (4.4°C) or below. Use a thermometer to monitor the temperature rather than relying on how much ice remains or how cold the food feels. Once perishable food is removed from cold storage, don’t leave it out for more than two hours, or one hour when the outside temperature is above 90°F (32°C).
The cooking temperatures worth knowing, based on USDA guidance, are: poultry 165°F (74°C), ground meat 160°F (71°C), whole cuts of beef, pork and lamb 145°F (63°C) with a three-minute rest, fish 145°F (63°C), and egg dishes 160°F (71°C).
For anything already cooked that you’re reheating – which includes most of the make-ahead meals in this guide – USDA guidance recommends reheating it to 165°F (74°C) throughout. The recipes below do not repeat that temperature for every reheated meal, but they do call out minimum temperatures where raw meat or egg dishes are being cooked as part of the recipe.
Check the latest USDA food safety guidance
Food safety recommendations can vary depending on the ingredients, how a meal was prepared and how it is being stored. The guidance above is intended as a practical starting point for camping, rather than a substitute for food-specific storage and handling advice. Before your trip, check the latest USDA and FoodSafety.gov recommendations for the particular foods you’re preparing, especially for safe storage times, freezing, thawing and minimum cooking temperatures.
💡 Freezer storage times vary by food
There isn’t one best-quality freezer time that applies to every make-ahead meal. Different foods and ingredients have different recommended storage times, and quality can decline during longer storage even when food remains continuously frozen. If you’re preparing meals well ahead of your trip, check the USDA or FoodSafety.gov guidance for the specific food or dish you’re freezing.
How to Freeze Meals Flat
Portion into meal-sized amounts rather than one large block. A family-sized slab of chili takes a long time to thaw and cannot be split into smaller portions once frozen, so two smaller bags beat one big one almost every time.
Fill heavy-duty freezer bags no more than two-thirds full, press out as much air as practical, seal, and lay them flat on a baking sheet in the freezer until solid. Flat portions stack neatly in a cooler and make it easier to pack meals by the order you plan to use them. If you use a vacuum sealer for saucy foods, follow the manufacturer’s instructions; many seal more cleanly if very wet foods are partially frozen first.
Label every bag with the contents and the date before it goes in, making it easy to refer back to later on at camp!
Prepping your food ahead of time makes packing that much easier. You can also use our car camping checklist to tick off your kitchen gear, cooler, sleeping setup and other essentials
Freeze-Flat Meals That Double as Ice
These go into the cooler frozen solid and sit in the coldest part, helping keep everything colder on the drive out.
When it’s time to eat, empty the meal into a pot, add a splash of water or stock if needed, and reheat until it’s piping hot. Don’t reheat food by placing an ordinary freezer or storage bag in boiling water unless the manufacturer specifically states that the bag is suitable for this use.
If you’d rather cook from scratch one evening instead, our one pot camping meals are a great fit too.
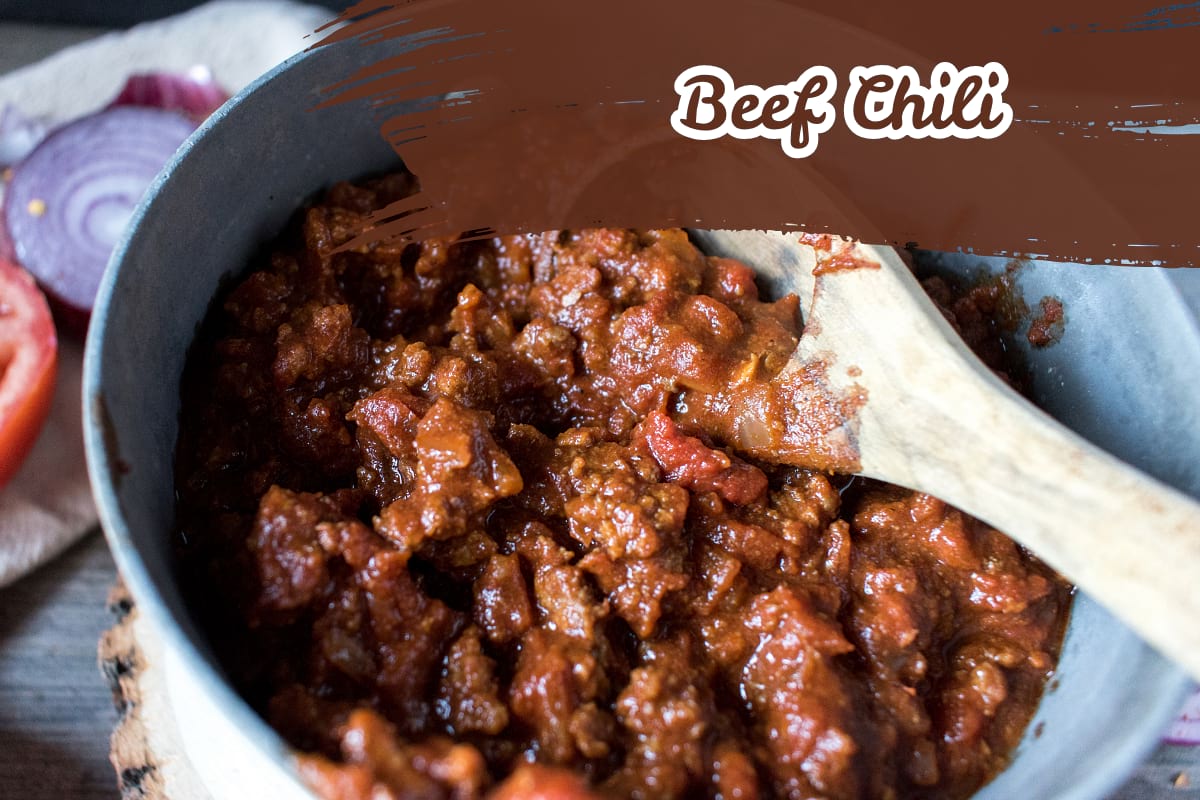
1. Beef Chili
At home: 1 hr · At camp: 15 min · Serves: 6
You’ll need:
- 2 lb ground beef
- 2 onions, diced, 4 cloves garlic, minced
- 3 tbsp chili powder, 1 tbsp ground cumin, 2 tsp dried oregano, 2 tsp salt
- 2 cans (15 oz each) kidney beans and 1 can (15 oz) black beans, drained
- 1 can (28 oz) crushed tomatoes, 2 tbsp tomato paste
- 1 cup beef stock
- At camp: 2 cups grated cheddar, 1 cup sour cream, tortilla chips, 3 scallions
At home: Brown the beef with the onions over medium-high heat for 10 minutes, add the garlic and spices for a minute, then the tomato paste, beans, tomatoes and stock. Simmer uncovered for 35 to 40 minutes until it is thick enough that a spoon leaves a trail. Divide it into shallow containers so it cools fast, refrigerate it, then freeze it flat in two bags once it is cold.
At camp: Empty the chili into a pot, add a splash of water if needed, and reheat over medium heat, stirring occasionally. Allow around 15 minutes if fully thawed. Serve with cheese, sour cream, chips and scallions.
Camp tip: Freeze the chili in portions that fit the pot you’ll use at camp. Smaller flat portions are easier to pack, thaw and reheat, and you can warm only what you need.
2. Chicken Tikka Masala
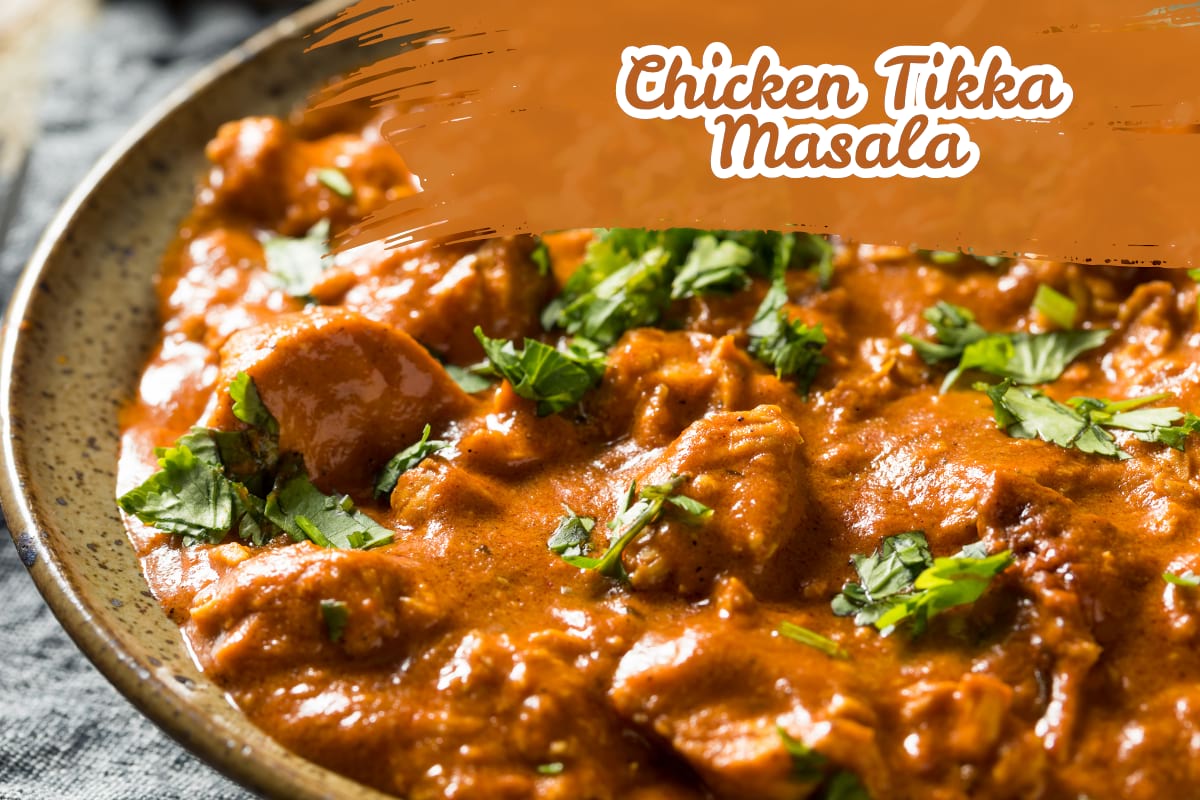
At home: 45 min · At camp: 15 min · Serves: 4
You’ll need:
- 1.5 lb boneless chicken thighs, cut into 1-inch pieces
- 1 onion, diced, 3 cloves garlic, 1 tbsp grated ginger
- 4 tbsp tikka masala curry paste
- 1 can (14.5 oz) crushed tomatoes
- 1/2 cup heavy cream or full-fat coconut milk
- 2 tbsp oil, 1 tsp salt
- At camp: 2 pouches (8.8 oz each) precooked rice, 4 naan, plain yogurt, cilantro
At home: Fry the onion in the oil for 6 minutes, add the garlic, ginger and curry paste for a minute, then the chicken and tomatoes. Simmer for about 25 minutes, until the chicken reaches 165°F (74°C) and the sauce has thickened, then stir in the cream off the heat. Divide into shallow containers, refrigerate promptly, then freeze flat once chilled.
At camp: Reheat the curry in a pot, adding a splash of water if needed. Warm the naan on the pot lid, then heat the rice pouches according to the package instructions. Finish with yogurt and cilantro.
Camp tip: Reheat the curry gently and stir it well as it warms. Finish with a spoonful of yogurt at the end if you want it a little creamier.
3. Bolognese
At home: 1 hr 15 min · At camp: 20 min · Serves: 6
You’ll need:
- 1.5 lb ground beef, or 1 lb beef and 8 oz ground pork
- 1 onion, 2 carrots and 2 celery stalks, finely diced
- 4 cloves garlic, 3 tbsp tomato paste
- 1 can (28 oz) crushed tomatoes, 1 cup beef stock, 1/2 cup whole milk
- 2 tbsp olive oil, 1 tsp dried oregano, salt and pepper
- At camp: 1 lb dry pasta, Parmesan, olive oil
At home: Soften the onion, carrot and celery in the oil for 10 minutes, add the garlic and tomato paste for 2, then the beef and brown it well. Add the tomatoes, stock and milk and simmer gently for 45 minutes until thick and glossy. Cool it quickly in shallow containers, refrigerate, then freeze flat in two bags.
At camp: Cook the pasta in a pot of salted water and drain. Reheat the Bolognese in the same pot, then stir the pasta through the sauce. Allow around 20 minutes altogether.
Camp tip: Only prep and freeze the Bolognese at home and cook the pasta fresh at camp. Cooked pasta can soften after freezing and reheating, while the Bolognese itself freezes and reheats well.
4. Pulled Pork
At home: 6–8 hr mostly unattended · At camp: 15 min · Serves: 8
You’ll need:
- 4 lb boneless pork shoulder
- 2 tbsp smoked paprika, 2 tbsp brown sugar, 1 tbsp salt, 2 tsp garlic powder, 1 tsp black pepper
- 1 cup chicken stock, 2 tbsp cider vinegar
- At camp: 8 burger buns, 1 cup barbecue sauce, 4 cups coleslaw, pickles
At home: Rub the pork all over with the spice mix. Cook it in a slow cooker according to the manufacturer’s instructions, or in a covered roasting dish in a 325°F (163°C) oven with the stock and vinegar until the pork is very tender and pulls apart easily with two forks. Cooking time will vary depending on the size and thickness of the pork. Shred it and mix it back into the cooking juices, then divide into shallow containers and refrigerate promptly before freezing in portions.
At camp: Reheat the pulled pork in a pot with a splash of water if needed, then pile into buns with barbecue sauce, slaw and pickles.
Camp tip: Freeze the pulled pork with enough of its cooking juices to keep it moist while it reheats at camp.
5. Thai Green Curry
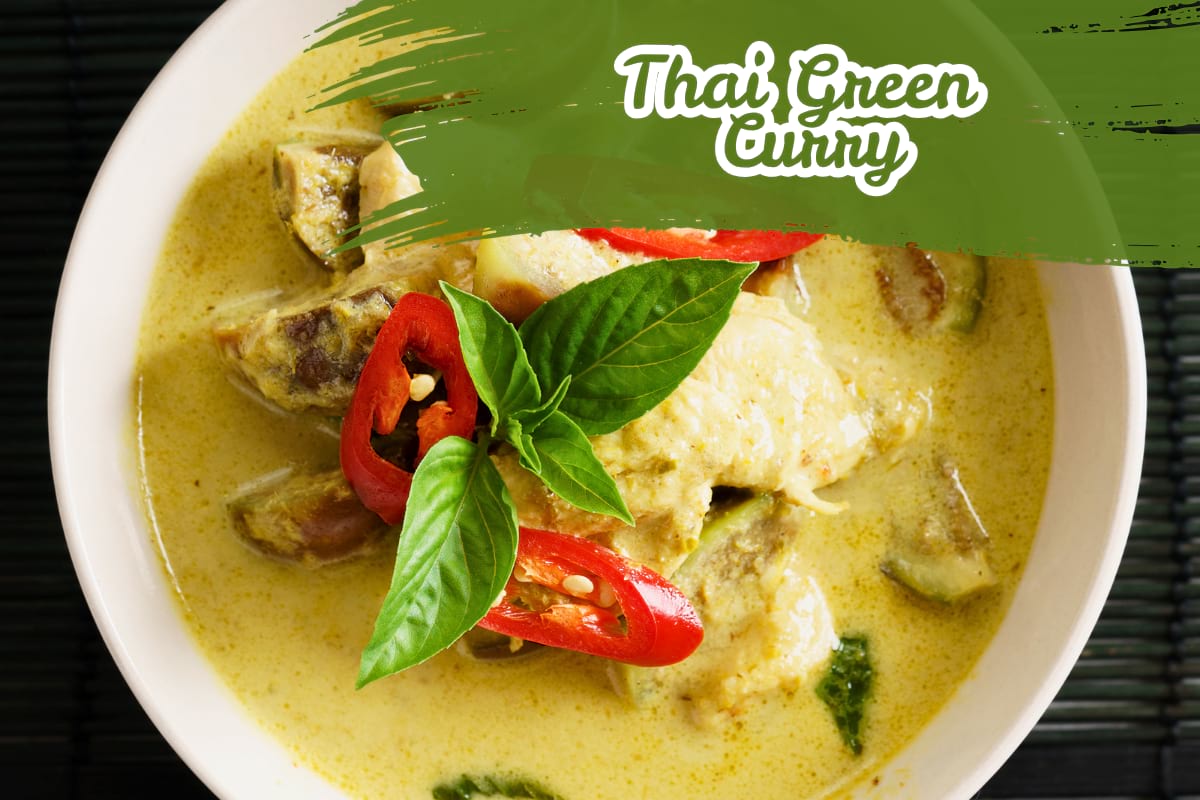
At home: 35 min · At camp: 15 min · Serves: 4 – 6
You’ll need:
- 1.5 lb boneless chicken thighs, sliced
- 4 tbsp green curry paste
- 2 cans (13.5 oz each) coconut milk
- 1 lb green beans, trimmed and halved, 1 red pepper, sliced
- 2 tbsp fish sauce, 1 tbsp brown sugar, 1 tbsp oil
- At camp: 2 pouches (8.8 oz each) precooked rice, 2 limes, fresh basil or cilantro
At home: Fry the curry paste in the oil for a minute, add the chicken and cook for 5 minutes, then add the coconut milk, fish sauce and sugar. Simmer for about 15 minutes, until the chicken reaches 165°F (74°C), adding the beans and pepper for the last 5 minutes so they keep some bite. Divide into shallow containers, refrigerate promptly, then freeze flat once chilled.
At camp: Reheat the curry, adding a splash of water if needed. Prepare the rice according to the package instructions, then finish the curry with lime and torn herbs.
Camp tip: Slightly undercook the vegetables at home so they still have some bite. They’ll continue to soften when the curry is reheated at camp, so this helps prevent them from becoming overly soft.
6. Sausage and White Bean Stew
At home: 40 min · At camp: 15 min · Serves: 4
You’ll need:
- 1 lb fully cooked smoked sausage, sliced 1/2 inch thick
- 1 onion, diced, 3 cloves garlic
- 2 cans (15 oz each) cannellini beans, drained
- 1 can (14.5 oz) diced tomatoes, 1.5 cups chicken stock
- 6 oz kale, chopped, 2 tsp chopped rosemary, 2 tbsp olive oil
- At camp: crusty bread, Parmesan
At home: Brown the sausage in the oil for 6 minutes, add the onion for 5 and the garlic and rosemary for 1. Add the beans, tomatoes and stock and simmer 20 minutes until thick, then stir in the kale for the last 3. Cool it quickly in shallow containers, refrigerate, then freeze flat.
At camp: Reheat the stew in a pot, adding a splash of water if needed. Serve with bread and Parmesan. Allow around 15 minutes if fully thawed.
Camp tip: Keep the stew fairly thick when you prepare it at home. If it needs loosening as it reheats at camp, simply add a little water or stock until it reaches the consistency you want.
Assemble at Home, Cook at Camp
These meals aren’t cooked in advance – the prep is simply done at home. The chopping, threading, marinating and portioning are taken care of before you leave, so all that’s left is to cook everything fresh at camp. Keep the prepared ingredients properly chilled in your cooler until you’re ready to cook.
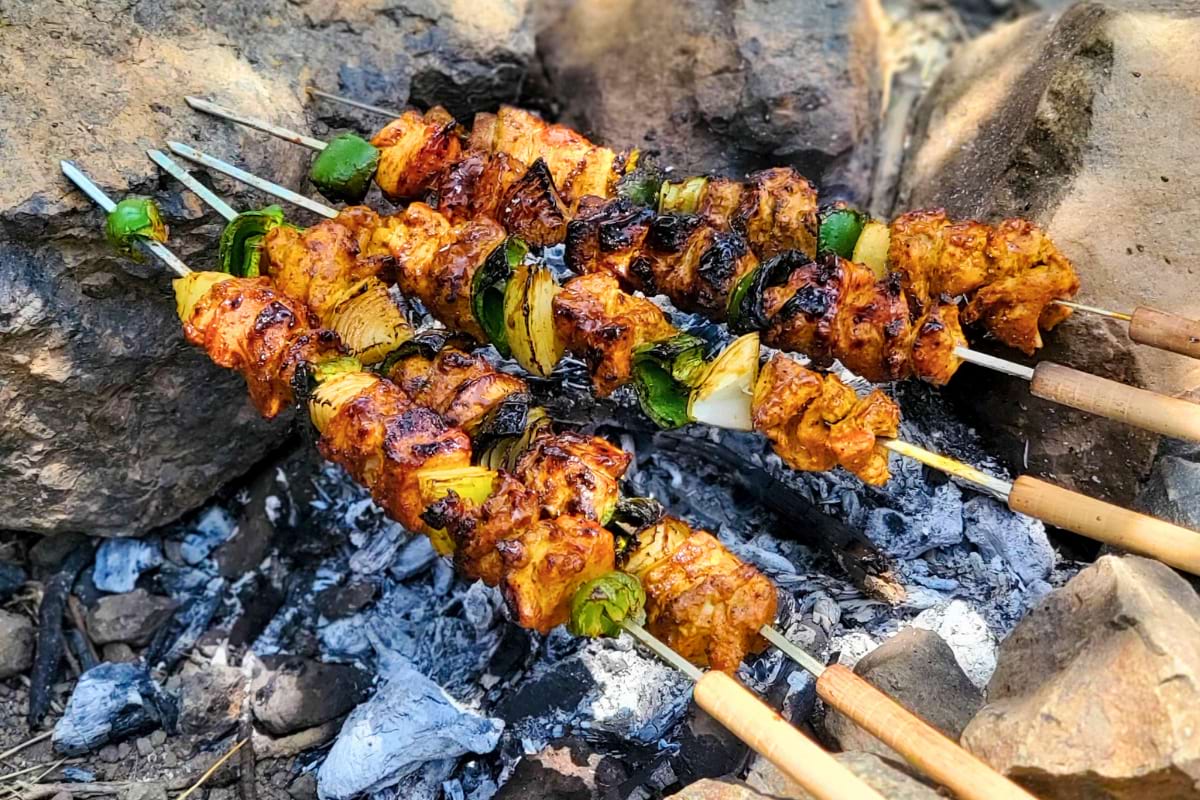
7. Marinated Chicken Kebabs
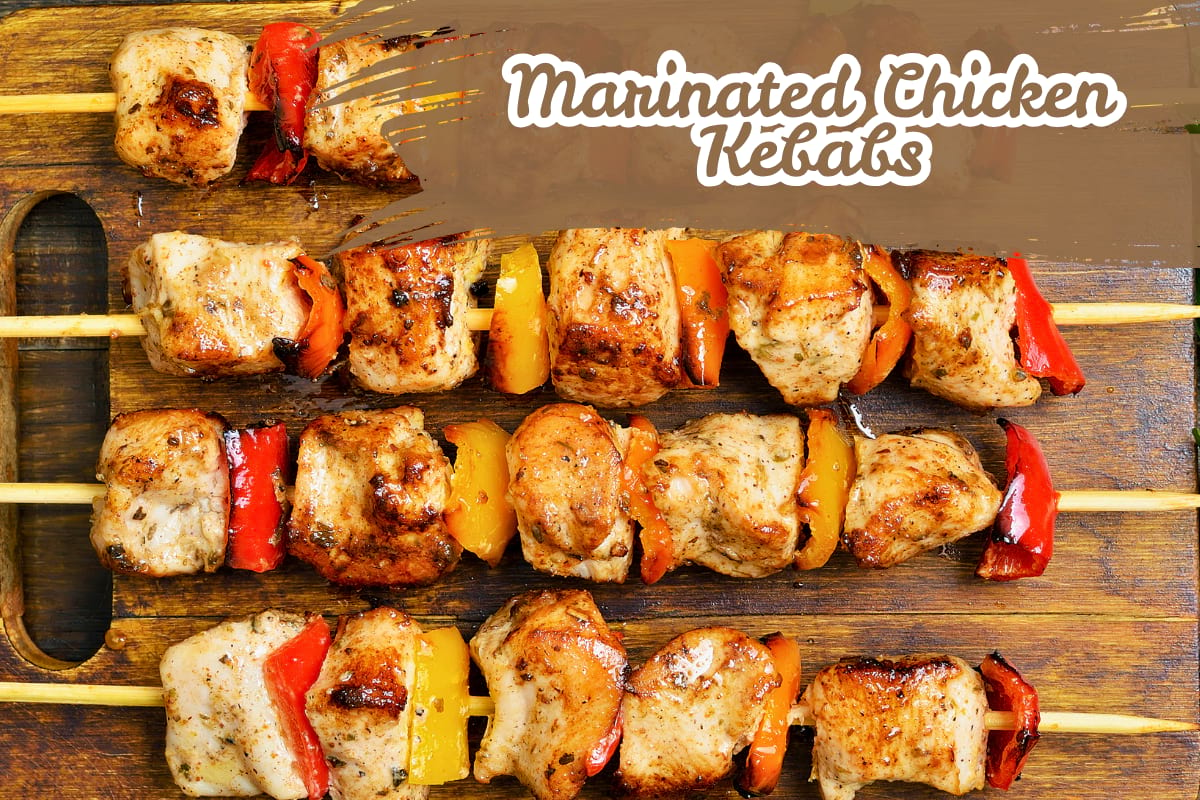
At home: 25 min plus marinating · At camp: 12 min · Serves: 4
You’ll need:
- 2 lb boneless chicken thighs, cut into 1.5-inch cubes
- 2 bell peppers and 1 red onion, cut into 1.5-inch squares
- 1/3 cup olive oil, 3 tbsp lemon juice, 4 cloves garlic, minced
- 2 tsp dried oregano, 2 tsp smoked paprika, 1.5 tsp salt
- 8 metal or soaked wooden skewers
- At camp: 4 flatbreads, 1 cup yogurt, hot sauce
At home: Marinate the chicken for at least 2 hours or overnight, then thread it onto skewers alternating with the peppers and onion. Lay them flat in a large bag or lidded tray and keep them at 40°F (4.4°C) or below. If you are preparing them further in advance, check the current USDA storage guidance for raw poultry and freeze them if needed.
At camp: Grill the kebabs over coals or on a grate for around 10 to 12 minutes, turning regularly, until the chicken reaches an internal temperature of 165°F (74°C). Serve in flatbread with yogurt and hot sauce.
Camp tip: Thread the skewers at home so they’re ready to go straight onto the grill at camp. Metal skewers are particularly convenient for prepping ahead, while wooden skewers may need soaking before use depending on the manufacturer’s instructions.
8. Smash Burger Pucks
At home: 15 min · At camp: 10 min · Serves: 4 (2 burgers each)
You’ll need:
- 2 lb ground beef (80/20), formed into 8 loose 4 oz balls
- 2 tsp salt, 1 tsp black pepper
- 8 slices American or cheddar cheese
- 8 small burger buns
- 1 onion, sliced paper thin
- At camp: pickles, mustard, burger sauce
At home: Form the balls without compacting them, season the outsides, and stack them in a container with squares of parchment between each layer. Keep them at 40°F (4.4°C) or below. If you are preparing them further in advance, check the current USDA storage guidance for raw ground beef and freeze them if needed.
At camp: Heat a griddle or heavy skillet until very hot. Add the beef balls and press each one firmly with a stiff spatula to form a thin patty. Cook for around 2 minutes, then flip, add the cheese and cook for another minute or two, until the beef reaches an internal temperature of 160°F (71°C).
Camp tip: Place a small piece of parchment between each portion before packing so they stay separated and are easy to remove individually at camp.
9. Chicken & Potato Foil Packets
At home: 25 min · At camp: 30–35 min · Serves: 4 (4 packets)
You’ll need:
- 1.5 lb boneless chicken thighs, cut into 1-inch pieces
- 1.25 lb baby potatoes, parboiled 8 minutes and halved
- 1 red onion, cut into wedges, 2 bell peppers, cut into 1-inch pieces
- 3 tbsp olive oil, 2 tsp smoked paprika, 1.5 tsp salt, 1 tsp black pepper
- Heavy-duty aluminum foil
- At camp: 1 cup grated cheddar, 3 scallions
At home: Parboil the potatoes for 8 minutes, drain, then toss them with the chicken, onion, peppers, oil and seasonings. Divide between four double-wrapped foil packets and keep at 40°F (4.4°C) or below until you’re ready to cook. If you are assembling the packets well ahead of the trip, check the current USDA storage guidance for raw poultry.
At camp: Cook the packets on a grate over hot coals for around 30 to 35 minutes, turning once. Carefully open one packet and check that the chicken has reached an internal temperature of 165°F (74°C) and the potatoes are tender. Top with cheddar and scallions before serving.
Camp tip: Parboil the potatoes before assembling the packets at home so they cook in roughly the same time as the chicken. Label each packet before packing, especially if you’re preparing different combinations.
For more ideas using the same method, see our foil packet camping recipes guide.
10. Chicken Stir-Fry Kit
At home: 20 min · At camp: 12–15 min · Serves: 4
You’ll need:
- 1.25 lb chicken breast, sliced into thin strips
- 12 oz broccoli florets
- 2 bell peppers, sliced
- 1 onion, sliced
- 1/3 cup soy sauce
- 2 tbsp brown sugar
- 1 tbsp grated fresh ginger
- 3 cloves garlic, minced
- 1 tbsp cornstarch
- 2 tbsp oil
- At camp: 2 pouches (8.8 oz each) precooked rice
At home: Pack the sliced chicken in a sealed container or bag, separate from the vegetables. In a small sealed jar, combine the soy sauce, brown sugar, ginger and garlic. Pack the cornstarch separately in a small container. Keep everything properly chilled until you’re ready to cook.
At camp: Mix the cornstarch with 2 tablespoons of cold water to make a smooth slurry. Heat the oil in a large skillet over high heat and cook the chicken, stirring regularly, until it reaches an internal temperature of 165°F (74°C). Transfer it to a clean plate, then stir-fry the vegetables for around 4 minutes, or until just tender. Return the chicken to the skillet, pour in the sauce and stir in the cornstarch slurry. Cook for another 1 to 2 minutes, stirring, until the sauce has thickened and everything is well coated. Prepare the rice according to the package instructions and serve alongside.
Camp tip: With the chicken and vegetables already sliced and the sauce mixed at home, most of the prep is done before you arrive. Keep the sauce and cornstarch separate until cooking so you can thicken the stir-fry at the end.
11. Marinated Flank Steak
At home: 15 min plus marinating · At camp: 15 min · Serves: 4
You’ll need:
- 2 lb flank or skirt steak
- 1/3 cup soy sauce
- 3 tbsp lime juice
- 2 tbsp brown sugar
- 2 tbsp oil
- 4 cloves garlic, minced
- 2 tsp ground cumin
- 1 tsp chili flakes
- At camp: 12 small tortillas, 1 onion, cilantro, 2 limes and salsa
At home: Mix the soy sauce, lime juice, brown sugar, oil, garlic, cumin and chili flakes to make the marinade. Place the steak and marinade in a sealed freezer bag, coat the meat well, and freeze flat. Keep frozen until you’re ready to move it into refrigerated storage to thaw safely.
At camp: Remove the steak from the marinade and grill over hot coals or sear in a hot skillet, turning once, until it reaches an internal temperature of 145°F (63°C). Cooking time will depend on the thickness of the steak, so check with a food thermometer rather than relying on time alone. Rest for at least three minutes, then slice thinly against the grain and serve in tortillas with onion, cilantro, lime and salsa.
Camp tip: Before cooking, take a look at the direction of the muscle fibers in the steak. When it’s time to serve, slice across those fibers rather than along them for more tender pieces.
12. Make-Ahead Dry Mix Jars
At home: 15 min · At camp: varies · Makes: 3 mixes
You’ll need:
- Pancake mix: 2 cups flour, 2 tbsp sugar, 4 tsp baking powder, 1 tsp salt
- Cornbread mix: 1 cup cornmeal, 1 cup flour, 2 tbsp sugar, 4 tsp baking powder, 1 tsp salt
- Taco seasoning: 4 tbsp chili powder, 2 tbsp cumin, 1 tbsp paprika, 2 tsp garlic powder, 2 tsp onion powder, 2 tsp salt, 1 tsp oregano
- At camp: eggs, milk, butter or oil as required, plus the ingredients you’ll be using with the taco seasoning
At home: Combine the ingredients for each mix and pack them separately in a sealed jar or bag. Label the pancake and cornbread mixes with the wet ingredients you’ll need to add at camp.
At camp: For the pancakes, combine the dry mix with 1½ cups milk, 1 egg and 2 tbsp melted butter, then cook on a greased griddle. For the cornbread, combine the mix with 1 cup milk, 1 egg and ¼ cup oil, then cook in a greased skillet or Dutch oven. Use the taco seasoning with your chosen taco filling, adding it during cooking to taste.
Camp tip: Label each mix with what you need to add and the basic cooking instructions before you leave. That way you can leave the individual bags of flour, cornmeal, baking powder and spices at home.
Fully Cooked, Just Reheat
These trays, bakes and other make-ahead meals are already cooked before you leave, so there is no assembly to do at camp. Keep them properly chilled or frozen until you need them, then reheat as described below.
13. Lasagna in a Foil Tray
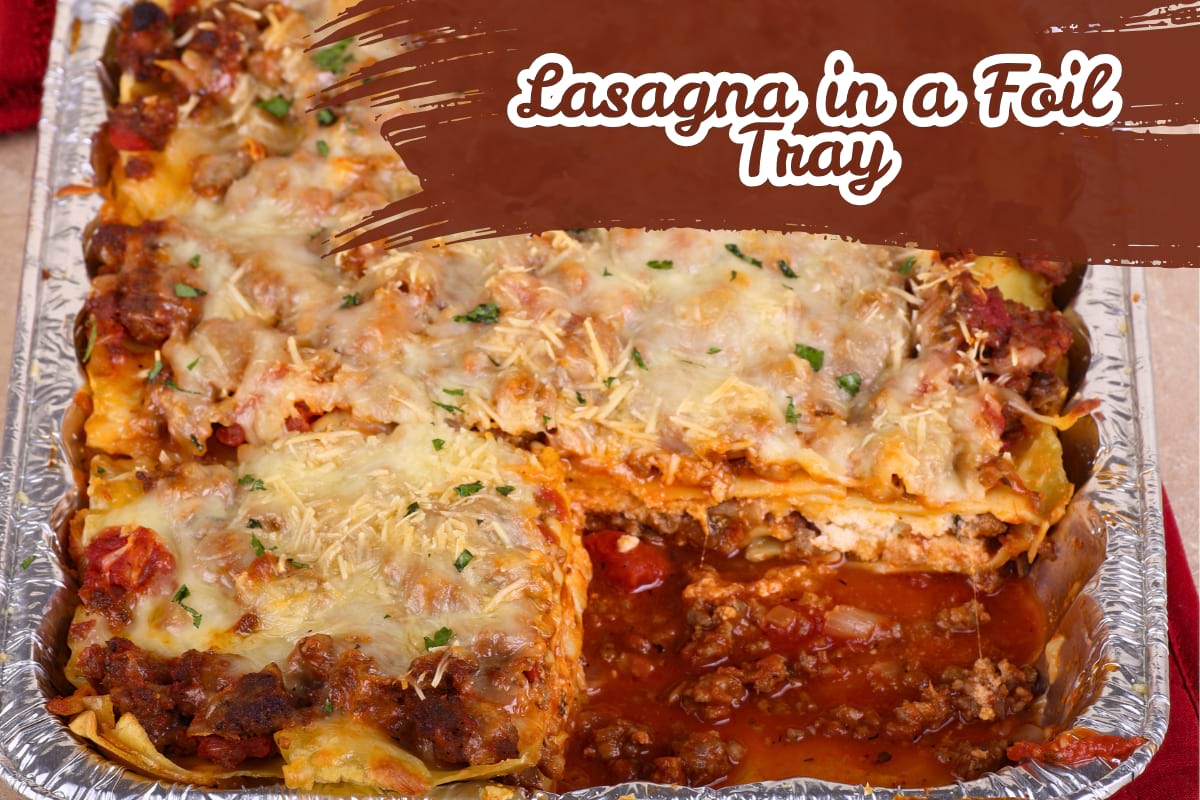
At home: 2 hr · At camp: 30–40 min · Serves: 6
You’ll need:
- For the meat sauce: 1.5 lb ground beef
- 1 onion, 2 carrots and 2 celery stalks, finely diced
- 4 cloves garlic, minced, 3 tbsp tomato paste
- 1 can (28 oz) crushed tomatoes, 1 cup beef stock, 1/2 cup whole milk
- 2 tbsp olive oil, 1 tsp dried oregano, 1.5 tsp salt, 1/2 tsp black pepper
- For assembly: 12 oven-ready (no-boil) lasagna sheets
- 2 cups ricotta, or 3 cups white sauce
- 3 cups grated mozzarella, 1 cup grated Parmesan
- 1 disposable foil tray, about 9 by 13 inches, with a foil lid
- Foil to cover the tray tightly
At home: Make the sauce first: soften the onion, carrot and celery in the oil for 10 minutes, add the garlic and tomato paste for 2 minutes, then brown the beef well. Add the tomatoes, stock, milk, oregano and seasoning and simmer gently for 45 minutes until thick. Layer the sauce, oven-ready pasta sheets, ricotta and mozzarella in the foil tray, finishing with mozzarella and Parmesan on top. Bake at 375°F (191°C) for about 40 minutes, or until the pasta is tender. Refrigerate promptly, then cover tightly and freeze once chilled.
At camp: From thawed, set the tightly covered tray on a grate over medium coals, or inside a Dutch oven with coals on the lid, and reheat until hot throughout. Allow roughly 30 to 40 minutes, checking as you go because campfire heat can vary. Rest for 5 minutes before cutting.
Camp tip: Keep the tray tightly covered for most of the reheating time so the center warms through before the top dries out. Remove or loosen the foil only at the end if you want a little browning.
14. Baked Mac and Cheese
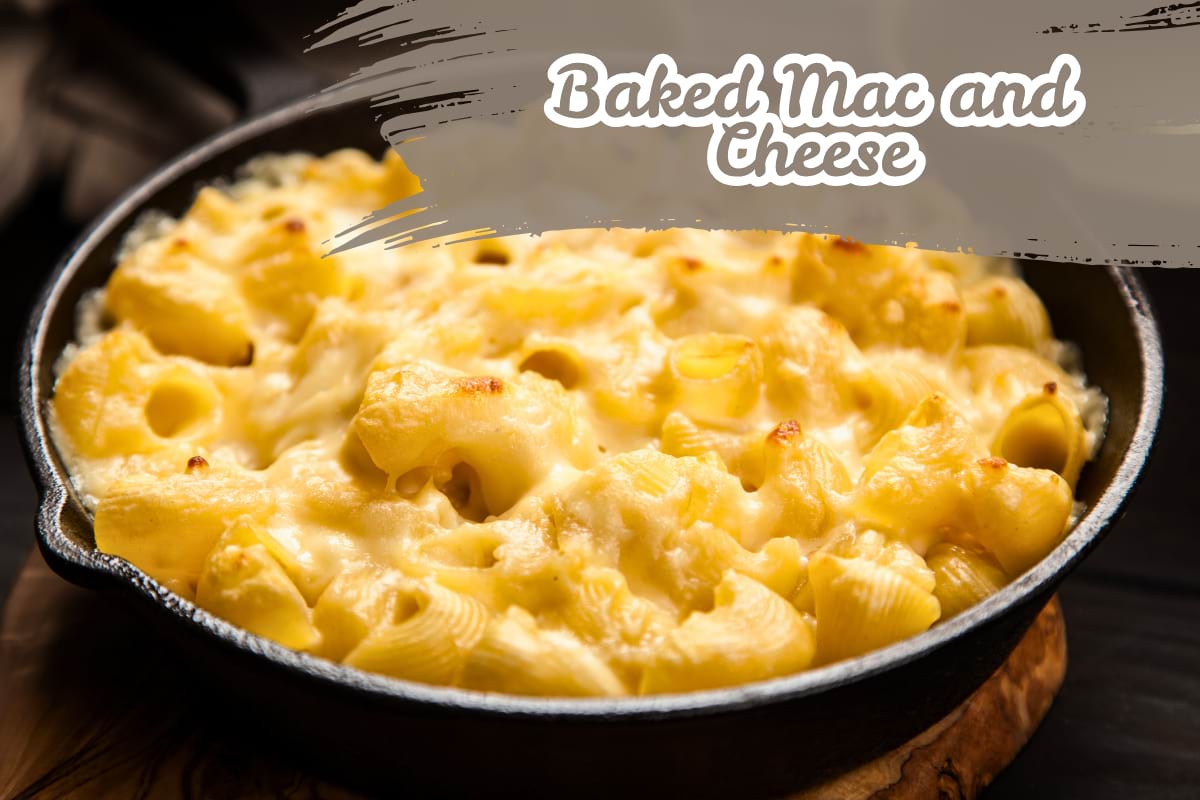
At home: 45 min · At camp: 30 min · Serves: 6
You’ll need:
- 1 lb dry macaroni
- 4 tbsp butter, 4 tbsp flour, 4 cups whole milk
- 1 lb sharp cheddar, grated, 1 tsp mustard powder, 1 tsp salt
- 1 cup panko breadcrumbs mixed with 2 tbsp melted butter
- 1 disposable foil tray with a foil lid
At home: Boil the pasta 2 minutes short of the packet time and drain. Make a roux with the butter and flour, whisk in the milk, cook until it thickens, then stir in the cheese and mustard powder. Combine with the pasta, spread in the tray and top with the buttered panko. Refrigerate until cold rather than cooling it on the counter, then freeze.
At camp: Reheat the covered tray on a grate over low to medium heat for around 25 to 30 minutes, or until hot all the way through. If you’re reheating it inside a Dutch oven, you can remove the foil for the last few minutes and place some coals on the lid to help brown the top.
Camp tip: Undercook the pasta by about 2 minutes and keep the cheese sauce slightly loose when you assemble the tray. If the mac and cheese seems dry as it reheats, stir in a small splash of milk.
15. Beef and Barley Stew
At home: 2 hr · At camp: 15 min · Serves: 6
You’ll need:
- 2 lb beef chuck, cut into 1-inch cubes
- 1 onion, 3 carrots and 2 celery stalks, chopped
- 3 cloves garlic, 2 tbsp tomato paste
- 1 cup pearl barley
- 6 cups beef stock, 2 bay leaves, 2 tsp dried thyme
- 2 tbsp oil, salt and pepper
- At camp: crusty bread
At home: Brown the beef well in the oil in batches, set aside, then soften the vegetables. Return the beef with the tomato paste, stock, barley, bay leaves and thyme, and simmer covered for about 90 minutes, or until the beef is tender and the barley is cooked. Divide into shallow containers, refrigerate promptly, then freeze flat once chilled.
At camp: Reheat the stew in a pot, adding a splash of water or stock if needed. Allow around 15 minutes if fully thawed.
Camp tip: The barley will continue to absorb liquid as the stew sits, so pack a little extra stock or water to loosen it while reheating if needed.
16. Freezer Breakfast Burritos
At home: 45 min · At camp: 15–20 min · Makes: 8
You’ll need:
- 8 large flour tortillas
- 12 eggs, scrambled softly and chilled
- 1 lb breakfast sausage, cooked and crumbled
- 1.5 lb potatoes, diced small and fried until golden
- 2 cups grated cheddar
- Foil for wrapping
- At camp: salsa and hot sauce
At home: Chill the fillings quickly, spreading them out in shallow containers and refrigerating them rather than leaving them on the counter, then build each burrito with egg, sausage, potato and cheese, roll tightly, and wrap individually in foil. Freeze them.
At camp: If fully thawed, warm the foil-wrapped burritos on a grate over low, indirect heat or in a covered skillet for around 15 to 20 minutes, turning every 5 minutes. If they are still frozen, allow extra time. Add salsa and hot sauce at the table.
Camp tip: Chill the cooked fillings promptly before rolling the burritos, and keep salsa or other watery toppings out of the filling until serving so the tortillas hold up better.
17. Chicken Enchiladas in a Foil Tray
At home: 1 hr · At camp: 30 min · Serves: 6
You’ll need:
- 4 cups shredded cooked chicken
- 12 corn or flour tortillas
- 3 cups red enchilada sauce, thick rather than thin
- 1 can (15 oz) black beans, drained, 1 cup corn
- 2 cups grated Monterey Jack or cheddar
- 1 disposable foil tray with a foil lid, parchment to line it
- At camp: sour cream, cilantro, 2 limes
At home: Line the tray with parchment. Mix the chicken, beans, corn and a cup of the sauce, roll into the tortillas, and pack them seam down in the tray. Pour over the remaining sauce, refrigerate until cold, then cover and freeze. Keep the cheese separate in a bag.
At camp: Reheat the covered tray on a grate for about 25 minutes, then scatter over the cheese and leave it uncovered for another 5 minutes, or until the cheese has melted and the center is hot throughout. Finish with sour cream, cilantro and lime.
Camp tip: Use enough sauce to keep the enchiladas moist without flooding the tray, and add the cheese at camp for a fresher finish.
Cold Meals That Need No Heat at All
These need nothing at camp but a fork, which makes them the right answer for arrival evening, hot afternoons, and the day you get back from a hike after dark and are too tired to even think about cooking. All of them are perishable, so they depend on the cooler holding temperature just as much as the frozen meals do.
18. Orzo Salad with Feta and Olives
At home: 25 min · At camp: 5 min · Serves: 4
You’ll need:
- 12 oz dry orzo
- 1 cucumber, diced, 2 cups cherry tomatoes, halved, 1/2 red onion, diced
- 1 cup pitted kalamata olives, halved
- 8 oz feta, cubed
- Dressing: 1/3 cup olive oil, 3 tbsp red wine vinegar, 1 tsp dried oregano, 1 tsp salt
- At camp: fresh mint or parsley, 1 lemon
At home: Cook the orzo, rinse it under cold water so it stops cooking and does not clump, and pack it with the vegetables and olives. Keep the feta and the dressing in separate containers.
At camp: Tip everything together into a bowl, add the dressing, toss, and finish with herbs and a squeeze of lemon.
Camp tip: Carry the dressing separately and add it just before serving so the orzo does not absorb too much of it while it sits. Rinsing the cooked orzo under cold water also helps cool it quickly and reduces sticking.
19. Sesame Noodle Salad
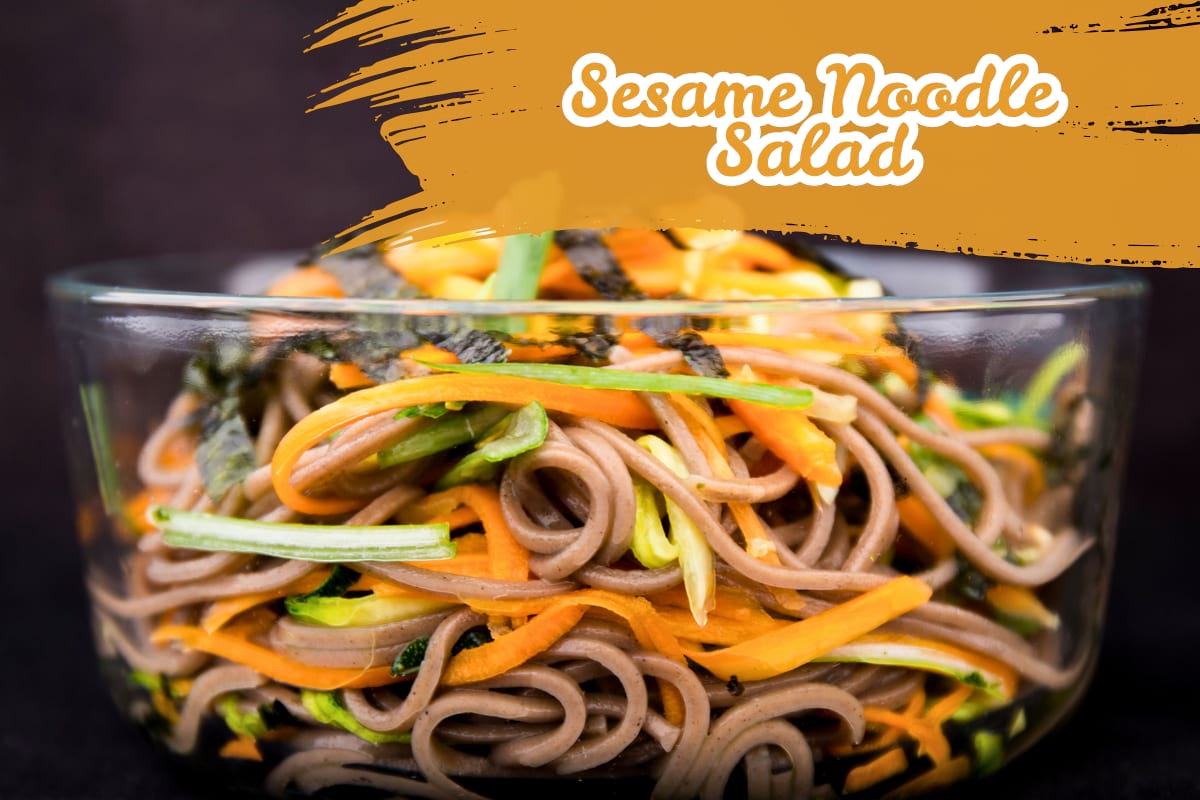
At home: 20 min · At camp: 5 min · Serves: 4
You’ll need:
- 12 oz soba, rice or egg noodles
- 1/2 cup smooth peanut butter, 1/4 cup soy sauce, 3 tbsp rice vinegar
- 2 tbsp sesame oil, 1 tbsp honey, 2 cloves garlic, minced
- 2 carrots and 1 cucumber, julienned
- At camp: 4 scallions, 1/2 cup roasted peanuts, 2 limes, cilantro
At home: Cook and drain the noodles, rinse them cold, and toss with the peanut butter, soy, vinegar, sesame oil, honey and garlic loosened with a few tablespoons of warm water. Pack the noodles and the raw vegetables in separate containers.
At camp: Fold the carrot and cucumber through the noodles and finish with scallions, peanuts, lime and cilantro.
Camp tip: Pack the carrot and cucumber separately and fold them through at camp so they keep more of their crunch.
20. Chicken Salad for Wraps
At home: 20 min · At camp: 5 min · Serves: 4
You’ll need:
- 4 cups shredded cooked chicken, from 1 rotisserie chicken
- 3/4 cup mayonnaise, 2 tbsp Dijon mustard, 2 tbsp lemon juice
- 3 celery stalks, finely diced, 1 cup halved grapes, 1/2 cup toasted pecans
- 1 tsp dried tarragon, 1 tsp salt, 1/2 tsp black pepper
- At camp: 8 large tortillas, 2 romaine hearts, shredded
At home: Mix everything except the pecans and chill in a sealed container. Bag the pecans separately so they stay crisp.
At camp: Stir the pecans through, spoon into tortillas with shredded romaine, and roll.
Camp tip: Keep the chicken salad at 40°F (4.4°C) or below and pack it in a reliably cold part of the cooler rather than somewhere that warms each time the lid is opened. Eat it within the current USDA storage guidance for cooked chicken and prepared salads.
21. Antipasto Box
At home: 15 min · At camp: 5 min · Serves: 4
You’ll need:
- 8 oz hard cheese such as aged cheddar, manchego or pecorino
- 8 oz dry-cured sausage or salami
- 1 jar (12 oz) roasted red peppers, 1 jar (6 oz) marinated artichokes
- 1 cup mixed olives, 1 cup cornichons
- 1 box crackers or 2 baguettes
- 1 small jar chutney or fig jam
At home: Pack the fridge items into one lidded box and the crackers and bread separately so they do not get crushed. Slicing the cheese and sausage ahead saves needing a board at camp.
At camp: Lay it out on a board or a lid and let people build their own.
Camp tip: This is an easy option for an evening when nobody feels like cooking. Keep any ingredients labeled as requiring refrigeration at 40°F (4.4°C) or below, and follow the storage instructions on the meat and cheese you choose.
Make-Ahead Breakfasts
Mornings are where prepping ahead pays off most, because nobody wants to cook before coffee. These three cover a weekend between them and none needs more than a few minutes of attention.
22. Overnight Oats Jars

At home: 10 min · At camp: none · Serves: 4
You’ll need:
- 2 cups rolled oats
- 2 cups milk or 2 cups plain yogurt thinned with 1/2 cup milk
- 4 tbsp chia seeds, 4 tbsp maple syrup or honey
- 1 tsp vanilla extract, 1/2 tsp salt
- 2 cups berries or 2 sliced bananas
- 4 jars or lidded tubs
At home: Divide the oats, chia, syrup, vanilla and salt between the jars, pour in the milk, stir and seal. Add the fruit on top rather than mixed through.
At camp: Eat straight from the jar once the oats have had several hours to soak. Keep the jars at 40°F (4.4°C) or below and check current food-storage guidance if you plan to make them more than a short time before the trip.
Camp tip: Make these in the jar you will eat from, so there is nothing to serve into and nothing to wash but the jar. Fruit on top rather than stirred through stops soft berries collapsing into the oats overnight.
💡 Avid Campers Insider Tip
A make-ahead breakfast is even better with a good cup of coffee. If coffee is non-negotiable on your camping mornings, take a look at our guide to the best camping coffee makers for options that work without your kitchen setup.
23. Baked Oatmeal Squares
At home: 45 min · At camp: none · Makes: 9 squares
You’ll need:
- 3 cups rolled oats
- 2 tsp baking powder, 2 tsp cinnamon, 1/2 tsp salt
- 2 eggs, 2 cups milk, 1/2 cup maple syrup, 1/3 cup melted butter
- 1.5 cups blueberries or diced apple
- 1/2 cup chopped nuts
At home: Mix the dry and wet ingredients separately, combine, fold in the fruit and nuts, and bake in a greased 9 by 9 inch pan at 350°F (177°C) for 35 to 40 minutes, or until set. Cut into 9 squares, refrigerate promptly, and freeze once chilled if you are making them further ahead.
At camp: Eat cold, or warm a square in a dry pan for a minute a side.
Camp tip: These are sturdier than muffins and do not shed crumbs through a bag, which makes them worth doubling as a trail snack.
24. Egg Muffin Cups
At home: 35 min · At camp: 5 min · Makes: 12
You’ll need:
- 10 eggs, 1/2 cup milk, 1 tsp salt, 1/2 tsp black pepper
- 6 slices bacon, cooked and chopped, or 6 oz cooked sausage
- 4 oz spinach, wilted and squeezed dry
- 1.5 cups grated cheddar
- 1 muffin tin, greased
At home: Whisk the eggs, milk and seasoning, divide the bacon, spinach and cheese between 12 greased muffin cups, pour the egg over and bake at 350°F (177°C) for 20 to 25 minutes, until set and the centers reach 160°F (71°C). Refrigerate promptly, then keep chilled or freeze once cold.
At camp: Eat cold straight from the cooler, or warm two per person in a covered pan over low heat until heated through.
Camp tip: Squeeze as much water as you can from the cooked spinach before adding it to the egg mixture so the muffin cups stay firm rather than watery.
Packing the Cooler
The temperature you need depends on what you are trying to do. Food that only needs refrigeration, including meals that are thawing, should stay at 40°F (4.4°C) or below. If you need meals to remain fully frozen for later in a longer trip, use a setup capable of keeping them at 0°F (-18°C) or below rather than assuming an ordinary ice-filled cooler will keep them frozen. Use an appliance or cooler thermometer to monitor the temperature. Our guide to how to keep food cold when camping covers coolers, dry ice and freezing food before you leave.
Pack with the meals you plan to use first easiest to reach, while keeping the items that need the coldest conditions in the coldest part of your setup. Keep raw meat sealed and separated from ready-to-eat foods to prevent cross-contamination. If you have room for a separate drinks cooler, it can help because frequent opening causes more temperature swings.
Frozen meals can contribute to keeping a cooler cold while they remain frozen, but they are not a substitute for enough ice, ice packs or another reliable cold source. Replenish ice whenever the thermometer or the amount of ice remaining shows that you need to.
A Weekend Eating Order That Works
For a typical weekend, Friday arrival dinner can be something with almost no prep, such as the antipasto box or a bag of chili reheated in a pot. Saturday morning can be one of the make-ahead breakfasts, followed by a cold salad for lunch and kebabs or foil packets for dinner. Sunday is a good time for something simple that needs very little from the cooler, such as pancakes from a dry mix jar.
That order is about convenience, not a guarantee of food safety. Keep perishable food at 40°F (4.4°C) or below and follow the current storage guidance for the specific foods you packed. A shelf-stable backup meal is also useful in case something has not thawed when expected or your cooler has not stayed within a safe temperature range.
The Gear That Actually Matters
Most of this article works with freezer bags and a baking sheet, which is genuinely the whole minimum. Three things beyond that make a difference.
Heavy-duty freezer bags are the foundation. Fill them two-thirds full, press the air out and freeze them flat on a tray, and they stack into a cooler far better than tubs while chilling what sits around them.

Gallon-size freezer bags are ideal for portioning soups, stews and sauces into flat packs that stack neatly in a cooler. The stand-up design also makes them easier to fill before laying them flat to freeze.
A cooler thermometer tells you whether your refrigerated food is actually staying at 40°F (4.4°C) or below. The amount of ice left can be useful to watch, but it does not tell you the exact temperature of the food.

Disposable foil trays with foil lids handle the lasagna, the mac and cheese and the enchiladas, and go from cooler to grate with nothing to wash afterwards.

Heavy-duty 9×13-inch foil pans are a practical size for prepping meals like lasagna, enchiladas and mac and cheese ahead of a camping trip. This 10-pack includes lids for storing and transporting each tray.
Beyond those, a vacuum sealer can be useful if you prepare meals well ahead of the trip or store them frozen for longer, and a permanent marker makes it easy to label each meal before it goes into the freezer. If you are putting together a full camp cooking setup rather than just the prep gear, our guide to camping kitchen essentials covers the ten things worth packing.
Make-Ahead Camping Meal FAQs
How far in advance can you make camping meals?
There is no single make-ahead window that applies to every camping meal. Recommended refrigerator and freezer storage times vary by the ingredients and the finished dish, so check the current USDA or FoodSafety.gov guidance for the specific food you are preparing. If you are making raw assembled items such as kebabs or a stir-fry kit, follow the refrigerated storage guidance for that meat or poultry and freeze it if you are preparing it further ahead.
How do you keep make-ahead camping meals cold?
For food that only needs refrigeration, keep the cooler at 40°F (4.4°C) or below and check it with a thermometer. If you need some meals to remain fully frozen for later in the trip, keep those in a setup capable of maintaining 0°F (-18°C) or below. Keep raw meat sealed and separated from ready-to-eat food.
Do frozen meals really work as ice packs?
Yes, frozen meals can contribute to keeping the cooler cold while they remain frozen, which is one reason freezing flat is useful. Do not count on the meals as your only cold source, though. Use enough ice, ice packs or another reliable cooling method and monitor the cooler with a thermometer.
How do you safely thaw frozen meals at a campsite?
Move the meal from frozen storage into refrigerated storage that stays at 40°F (4.4°C) or below and let it thaw gradually there. If your cooler is being kept at or very close to freezing, a meal may stay frozen for much longer than you expect, so do not assume it will be thawed by a particular evening. You can also thaw it safely in the refrigerator before you leave if that works better for your meal plan.
How do you reheat make-ahead meals at camp?
Empty the meal into a pot and reheat it to 165°F (74°C) throughout, adding a splash of water or stock only if the food needs loosening. Do not place an ordinary freezer or storage bag in boiling water unless the manufacturer specifically states that the bag is suitable for that use.
Can you prep camping meals without a vacuum sealer?
Yes. Heavy-duty freezer bags pressed flat work well for many of the meals in this guide, while disposable foil trays with lids handle the casseroles. A vacuum sealer is optional and is most useful if you prepare food well ahead of the trip or keep it frozen for longer.
What is the right order to eat make-ahead camping meals?
There is no single order that works for every trip. As a practical rule, use foods with the shortest refrigerated storage window first, prioritize meals that have already thawed, and keep later meals fully frozen if your setup allows. For safety, keep refrigerated food at 40°F (4.4°C) or below and follow the current storage guidance for each food rather than relying on the eating order alone.