Camping Kitchen Essentials: 10 Things Worth Packing
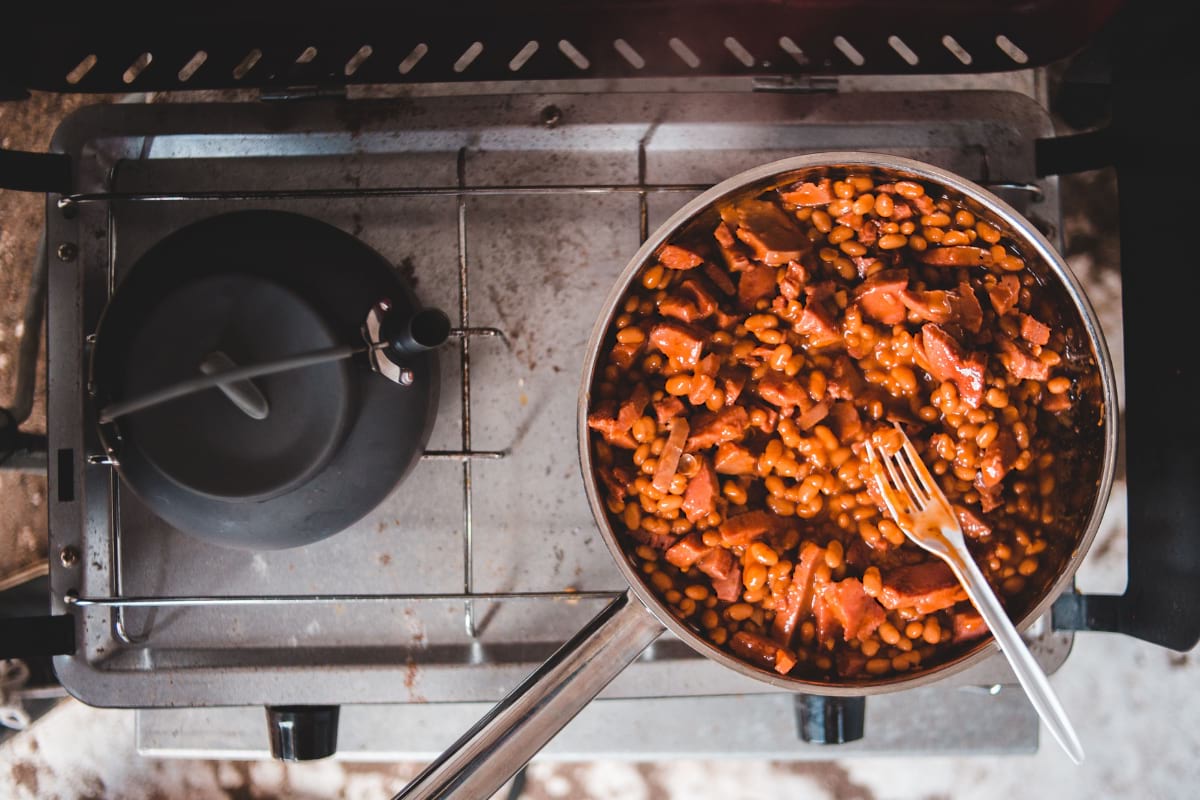
A camp kitchen usually fails in one of two directions. Either you pack half the house and spend the first twenty minutes of every meal digging through a tote looking for a spatula, or you pack almost nothing and end up eating cold beans out of the can on night two.
The fix is not more gear. A small number of well-chosen pieces will cover breakfast, one-pan dinners, grilling, campfire cooking, food safety and cleanup, and they will fit in a single box in the trunk.
For car camping, the most useful setup is usually a fairly simple one. A few extra pounds in the trunk aren’t a problem, but bulky gear that never gets used is. The camping kitchen essentials below are the pieces worth prioritizing, what to look for in each one, and which ones you can skip without regret.
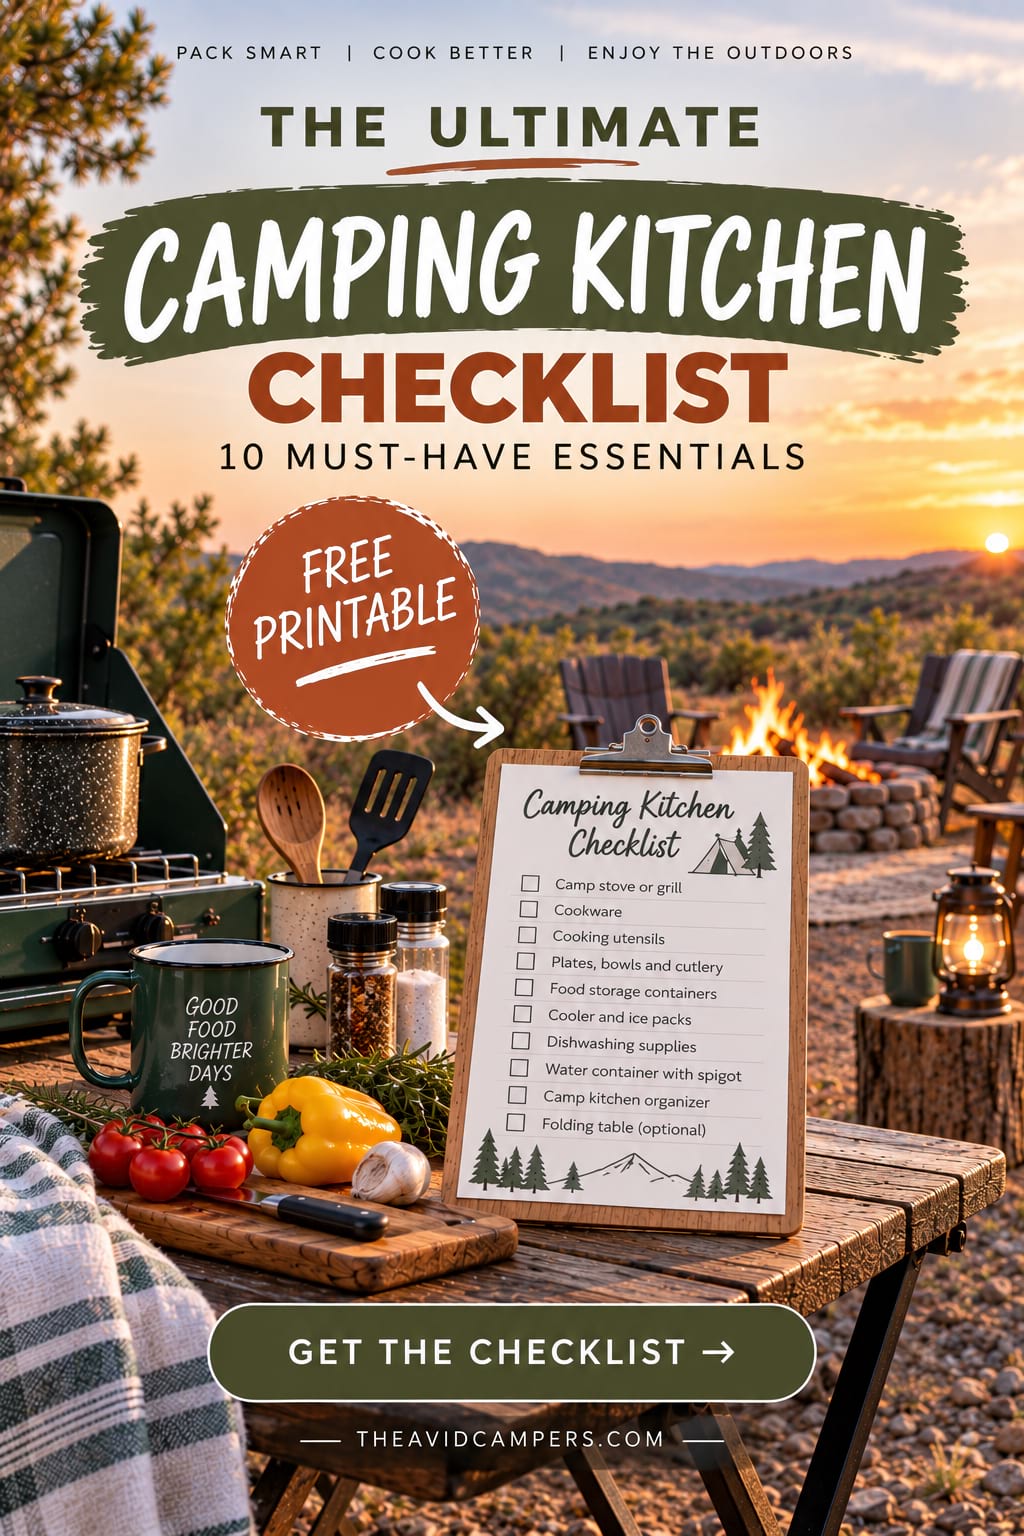
Want the printable version? Scroll down to grab our free Camping Kitchen Checklist and tick everything off before your next trip.
This post contains affiliate links. As an Amazon Associate, I earn from qualifying purchases. If you book or buy through these links, I may earn a small commission at no extra cost to you. This helps support Avid Campers and allows me to keep creating free outdoor content.
The Quick Camp Kitchen Checklist
Ten categories, what each earns its space for, and the pick for it. Detail follows below.
| Essential | Why You Need It | Our Pick |
|---|---|---|
| Two-burner camp stove | Controllable heat that does not depend on a fire ring or on fire conditions | Coleman Triton+ 2-Burner Propane Stove |
| 12-inch cast iron skillet | One pan for breakfasts, burgers, vegetables and one-pan dinners | Lodge 12-Inch Cast Iron Skillet |
| Camp Dutch oven | Stews, chili, bread and cobblers cooked with coals | Lodge 6-Quart Camp Dutch Oven |
| Heavy-duty aluminum foil | Foil packet meals, wrapping, lining and faster cleanup | Reynolds Wrap Heavy Duty Foil |
| Compact cutting board | A clean, washable prep surface that is not the picnic table | GSI Outdoors Folding Cutting Board |
| Long locking tongs | Reach over coals and a hot grate without leaning into the heat | OXO Good Grips 16-Inch Locking Tongs |
| Heat-resistant gloves | Handling cast iron, grates and Dutch oven lids | RAPICCA BBQ Gloves |
| Instant-read thermometer | The only reliable way to know meat is cooked to a safe temperature | TempPro TempSwift Instant-Read Thermometer |
| Cooler thermometer | Tells you whether the cooler is actually holding 40°F or below | Taylor 5924 Refrigerator/Freezer Thermometer |
| Clean-up kit | A basin, scrubber and soap so dishes get washed away from water sources | Sea to Summit Camp Kitchen Clean-Up Kit |
Cooking Essentials
These three do the actual cooking. If you only ever buy two things, buy the first two.
1. Two-Burner Camp Stove
A stove is what makes the rest of the kitchen predictable. A fire needs building, then it needs to burn down, and the heat it gives you is uneven and hard to turn down. That is fine when dinner is a foil packet. It is miserable when three people want coffee and the wood is damp.
Two burners matter more than the total power figure. With two you can hold a sauce at a simmer while something browns beside it, which is the difference between eating at 7pm and eating at 8:30pm.
What to look for
- Two independently adjustable burners, not one valve feeding both
- A low setting that holds a simmer instead of only running hot
- Wind guards, since wind steals more heat at a campsite than most people expect
- A cooktop that fits the pans you already own, the spec people forget to check
- Push-button ignition, so you are not lighting a burner with a match in the wind
Our pick: Coleman Triton+ 2-Burner Propane Stove
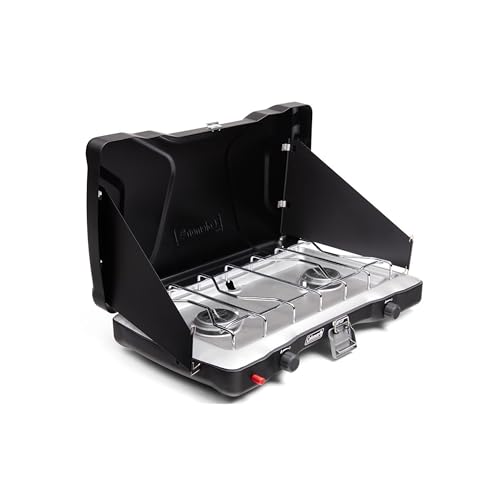
A practical two-burner stove for car camping, with independently adjustable burners, push-button ignition and wind guards for more controlled campsite cooking.
The Triton+ covers that list without asking much of you. Two independently adjustable burners give 22,000 total BTUs, the Instastart ignition is push-button, the two wind guards fold out and adjust, and the aluminized steel cooktop has a removable chrome-plated grate, which is the part that actually needs cleaning. Coleman rates it for up to an hour on high on a single 16 oz propane cylinder, and the cooktop fits one 12-inch and one 10-inch pan.
The drawbacks are worth knowing. Coleman rates it for up to one hour on high on a single 16 oz propane cylinder, so a weekend of regular cooking means packing additional fuel or using a compatible larger refillable tank setup.. It needs a flat, stable surface, and an electronic igniter is a convenience rather than a guarantee, so keep a lighter in the box. Skip it only if you camp solo with a canister stove and you are happy with that.
One thing worth being clear about: propane stoves are often, but not always, allowed when campfires are banned, the reasoning being that a gas appliance can be shut off at a valve while a wood fire has to be put out. Some orders still restrict gas devices, and rules differ between a national forest, a BLM district, a state park and the county next door. Check the current order with the land manager where you are camping.
💡 Insider Tip
Check the cooktop size before you buy pans, not after. Coleman rates the Triton+ cooktop for one 12-inch and one 10-inch pan, so a 12-inch skillet takes up one whole side. Plan the second burner around a 10-inch pot or a kettle and you will never have to cook in shifts because two pans would not fit.
2. 12-Inch Cast Iron Skillet
One good pan does most of the work at camp: eggs and bacon, burgers, sausages, peppers and onions, hash, cornbread, a skillet cobbler. Twelve inches is the size that stops you cooking in shifts, and cooking in shifts means the first batch is cold before the second is ready.
A 12-inch skillet is also a useful size for many of our easy camping meals, particularly breakfasts, one-pan dinners and meals where you’re cooking for more than one person.
Cast iron earns its place for one specific reason. It holds a lot of heat, so it does not crash in temperature the moment cold food hits it, which is exactly what a thin pan does on a windy camp stove. It also goes places other pans should not, like a grill grate or coals raked to the side of the fire. What to check before buying: that it is pre-seasoned so it works on the first trip, and that it has a helper handle opposite the main one, because a loaded 12-inch pan is heavy.
Our pick: Lodge 12-Inch Cast Iron Skillet
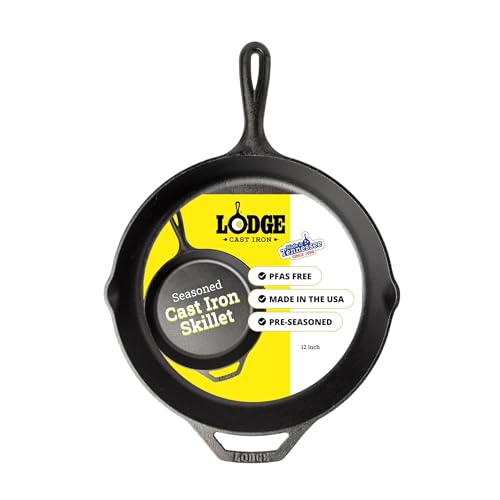
A versatile 12-inch cast iron skillet for campsite breakfasts, one-pot dinners and cooking over a camp stove, grill or campfire.
The Lodge L10SK3 is the default for good reason. It’s a 12-inch skillet weighing just under 8 pounds, with a helper handle and two pour spouts. It comes naturally seasoned and is made in the USA. Lodge rates it for use on the stovetop, grill and campfire, which makes it particularly versatile for car camping.
The drawbacks are real. Eight pounds is eight pounds, it has to be hand washed and dried right away, the seasoning needs occasional attention, and the handle gets as hot as the pan. Cast iron is also brittle, so dropping it on a rock can crack it. Skip it if you are backpacking, if your cooking is mostly boiling water, or if you know the pan will go back in the tote wet. A stainless or nonstick pan you already own is a reasonable substitute.
3. Camp Dutch Oven
This one needs a definition first. A camp Dutch oven is not the Dutch oven in your kitchen. It has three integral legs so it stands above coals, a flat flanged lid designed to hold coals on top so heat comes from both directions, and a wire bail handle for lifting it or hanging it from a tripod. A kitchen Dutch oven has a flat bottom and a domed lid, so it can do neither.
That design is what lets you bake at a campsite. Chili and stew are the obvious uses, but the interesting ones are cobbler, cornbread, pot roast, pulled pork and actual bread, cooked while you sit by the fire doing nothing.
Our pick: Lodge 6-Quart Camp Dutch Oven
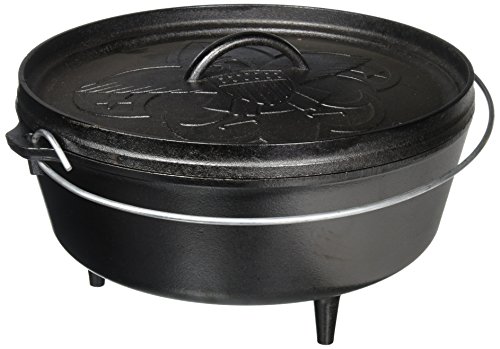
A classic 6-quart camp Dutch oven with integral legs and a flanged lid, designed for cooking with coals. A great choice for campsite stews, chili, bread and desserts.
The Lodge L12CO3 is the 12-inch, 6-quart size and weighs 18 pounds with its cast-iron lid. It comes naturally seasoned, has integral legs for positioning it over coals and a steel bail handle for lifting and carrying.
On coals, be skeptical of any rule that sounds too tidy. Most charts start from a briquette count based on the oven diameter, which is a reasonable starting point, but wind, air temperature, altitude and even the brand of briquette all move the result. Treat the count as a guess, check early, and rotate the oven and the lid now and then so hot spots do not settle in one place.
Be honest about whether you want one. It is 18 pounds of cast iron, it needs coals and time, and it needs a fire or charcoal, which may be exactly what current restrictions rule out. A stove and a skillet cover a full weekend of good food without it. This is an essential for campers who want to expand what they cook over a fire, not a box everyone has to tick.
If you want more ideas for putting it to use, our one-pot camping meals include plenty of simple meals that work well when you want to keep both cooking and cleanup manageable.
💡 Insider Tip
The lid is a second pan. Lodge designs the flanged camp lid to invert and work as a griddle, which on the 12-inch model gives you a cooking surface the size of a large skillet. Bacon and eggs on the upturned lid while the coals underneath work on something else is the cleanest use of a single heavy piece of cast iron.
Food Prep and Fire-Side Tools
None of these four cook anything. They are what make cooking at a campsite feel less like a fight.
4. Heavy-Duty Aluminum Foil
Foil is the cheapest thing on this list and probably the most used. Foil packets turn a fire into an oven with no extra cookware, and the same roll wraps leftovers, covers a pan that has no lid, lines a grill grate so cleanup means lifting one sheet, and wraps potatoes to bury in coals.
Standard foil is fine for wrapping a sandwich. It is less suited to folding a sealed packet, carrying it to a fire, turning it with tongs and pulling it back out. Heavy-duty foil is thicker and less prone to tearing while you do that, which is the whole argument for it. Reynolds does not publish an exact thickness, so treat it as sturdier rather than as a number, and note it comes in an 18-inch width as well as the standard 12, which makes packet folding much easier. One habit worth keeping: used foil goes in the trash bag, not the fire ring.

A practical choice for foil packet meals and campfire cooking. The heavy-duty foil is less prone to tearing when wrapping food or cooking around the grill and coals.
5. Compact Cutting Board
Campsite picnic tables are shared surfaces that have hosted a lot of previous dinners and have never once been sanitized. A board you can wash is worth its small footprint, and it gives you somewhere to keep raw meat prep away from everything else.
The GSI Outdoors folding board opens to a 12.6 × 9-inch prep surface, weighs just under 10 ounces and folds down for easier packing. The flexible design also makes it easy to funnel chopped ingredients straight into a pot.
You almost certainly do not need a camping knife set to go with it. A decent kitchen knife from home, carried in a blade guard, does everything a camp knife roll does and cuts better.
6. Long Locking Tongs
Regular kitchen tongs put your hand about eight inches from whatever is hot. Over a fire or a loaded grill grate, that is the difference between turning the sausages and retreating from them. Sixteen inches is close to the sweet spot: real reach over a grate or into the edge of a fire, without being so long you lose control of what you are gripping.
The OXO Good Grips 16-inch pair is brushed stainless with scalloped heads that hold food properly, non-slip handles, and a lock that closes them for storage with a pull tab that doubles as a hanging hole. About 8 ounces, and dishwasher safe when you get home. If you mostly cook on the stove rather than over fire, a 12-inch pair is more precise and less unwieldy. The long ones are for the fire.
7. Heat-Resistant Gloves
Cast iron handles reach the same temperature as the pan. A Dutch oven lid covered in coals has to come off somehow, grates need moving and logs need repositioning. A folded dish towel is fine for a warm handle on the stove and is not what you want when you are reaching over a fire.
The RAPICCA gloves are the popular choice for this. They use a food-grade neoprene coating over a double-layer cotton liner, with a textured palm for grip on greasy or wet items and a 14-inch sleeve that covers the forearm as well as the hand. A 17-inch version exists if you want more coverage. RAPICCA states heat resistance up to 932°F.
Read that rating for what it is. A stated temperature limit is not a promise of unlimited contact time, and how well any glove protects you depends on how hot the item is and how long you hold it. They are extra protection and a reason to move deliberately, not a reason to grab whatever you like. Follow the manufacturer instructions, and use a proper lid lifter for a coal-covered Dutch oven lid rather than relying on gloves alone.
Food Safety Essentials
Product links in this section and the one below are affiliate links.
These two are the cheapest items here and the most likely to matter. Camping is where food safety gets casual, because the fridge is a box of melting ice and the kitchen is a table outdoors.
8. Instant-Read Food Thermometer
You cannot tell whether meat is safely cooked by looking at it. Ground beef can turn brown well before it reaches a safe temperature, and safely cooked pork can still look faintly pink. At a campsite it gets worse, because you are usually judging color by headlamp.
The USDA safe minimum internal temperatures worth committing to memory:
- Poultry, whole or in parts or ground: 165°F
- Ground beef, pork, lamb and veal: 160°F
- Steaks, chops and roasts of beef, pork, lamb and veal: 145°F, then rest at least 3 minutes
- Fish: 145°F, or until the flesh is opaque and separates easily
- Egg dishes: 160°F
- Leftovers and anything reheated: 165°F
The other half of the rule is time. Perishable food should not sit out of refrigeration for more than 2 hours, or more than 1 hour above 90°F. That window goes fast when everyone is round the fire and the potato salad is still on the table.
Our pick: TempPro TempSwift Instant-Read Thermometer

A fast instant-read thermometer for checking meat and other foods at camp, taking the guesswork out of knowing when chicken, burgers and other campsite meals are safely cooked.
What matters in the tool is a fast read, a folding probe that protects the tip in a tote, a backlit display for cooking after dark, a hold function so you can read it away from the heat, and a calibration function to keep it honest. The TempSwift line covers all of that, with roughly one-second readings, a folding stainless probe and a magnetic back for storage. Water resistance ratings differ between models in the line, so check the rating on the one you buy if you expect to rinse it under a tap. TempPro is also the current name for what was sold as ThermoPro, so packaging may show either.
💡 Insider Tip
Test the thermometer before you trust it. Fill a cup with crushed ice, top it with cold water, stir, and put the probe in without touching the sides. It should read 32°F. That is what the calibration function on the TempSwift is for, and it takes about a minute at the kitchen sink before you leave.
9. Cooler or Refrigerator Thermometer
It’s easy to assume that as long as there’s still ice in the cooler, your food is cold enough. A cooler thermometer takes the guesswork out of it, letting you check that perishables are actually being held at 40°F or below.
The USDA line is simple: keep perishable food at 40°F or below, and put an appliance thermometer in the cooler to check that it is holding. Bacteria multiply fastest between 40°F and 140°F. On a one-night trip you can mostly get away with guessing. On a three-day trip in August, with a cooler opened every time someone wants a drink, guessing is how the chicken you saved for the last night becomes a bad idea.
The Taylor 5924 answers the question cheaply: it’s a simple 3-inch analog thermometer with clearly marked safe-temperature zones. It’s NSF certified, can either hang or stand, and because it’s analog there are no batteries to worry about. Taylor says it shouldn’t be immersed in water, so position it where it won’t end up sitting in cooler meltwater.
There is no cooler recommendation here on purpose, since coolers vary enormously in size, insulation, price and what a trip needs. That deserves its own guide.
Keeping a cooler at a safe temperature starts with how you pack and manage it. Our guide to keeping food cold while camping covers the full process, including ice, cooler organization and food-storage tips.
💡 Insider Tip
The USDA recommendation for longer trips is two coolers, not a bigger one: one for drinks and the day’s food that gets opened constantly, and one for the perishables you are saving, which stays shut. Pack food into the cooler straight from the fridge or freezer, and meat and poultry can go in still frozen.
Camp Kitchen Cleanup
10. Collapsible Camp Kitchen Clean-Up System
Cleanup is the part nobody plans for and everybody resents. Without a basin you end up doing dishes in a bathroom sink, at a shared spigot, or worst of all in the lake, which is either against campground rules or genuinely damaging. A basin lets you carry water to where you want to wash, contain the food scraps, and dispose of the dirty water on your terms.
Our pick: Sea to Summit Camp Kitchen Clean-Up Kit

A compact campsite washing kit built around a 10-liter collapsible sink, with the basics for washing cookware and utensils while taking up minimal space when packed.
Six pieces at 9.5 ounces total: a 10-liter collapsible sink with a broad base and stiffened rim so it holds its shape when full, a pot scrubber with an integrated scraper, a refillable 50 ml bottle of concentrated biodegradable Wilderness Wash, a double-sided washcloth, a quick-drying DryLite towel and a zip pouch. The sink packs flat and the rest nests inside it.
Two manufacturer limits worth respecting: the sink is rated for water up to 140°F (60°C), so no boiling water straight in, and bleach damages the coating. At 10 liters it suits solo campers and small to medium groups, so a family of six after a big meal will want more capacity or a second basin for rinsing.
On disposal, Leave No Trace guidance is specific and easy to follow. Carry water at least 200 feet from streams and lakes, use small amounts of biodegradable soap, scrape and strain out the food scraps and pack them out with the trash, then scatter the strained water rather than dumping it in one spot. Where a campground provides a utility sink or gray water station, use it. Rules vary by campground and land manager, and some sites require gray water to be packed out entirely, so check locally.
💡 Insider Tip
Do not pour boiling water into a collapsible sink. Sea to Summit rates this one to 140°F (60°C), and hotter water damages the seam tape. Bleach is out too, since it degrades the coating. Boil your water, then cut it with cold before it goes in the basin.
How to Set Up a Simple Camp Kitchen
Camp kitchen setup is mostly about deciding where things live before you are hungry. Five zones is enough, and they fit around one picnic table and the trunk of a car.
- Cooking. Stove on a flat, stable surface, wind guards turned into the wind, nothing flammable overhead, clear of the path people walk carrying things.
- Food prep. Cutting board, knife and tongs, at the opposite end of the table from the stove.
- Cold storage. Cooler in the shade, closed, thermometer inside. Keep drinks in a separate cooler if you can, since the one opened constantly is the one that warms up.
- Dry storage. One tote for food that needs no chilling, one for cookware, so you are not unpacking pans to find the coffee. Where a campground provides food lockers, use them.
- Washing. Basin, trash bag and towel, away from the cooking and prep zones so splashed water and food scraps stay in one place.
The rule worth being strict about is separation. Raw meat gets prepped on its own surface, stored at the bottom of the cooler so nothing drips onto anything else, and never touches a plate or board that has held ready-to-eat food. Wash your hands, and where there is no running water, use hand sanitizer with at least 60 percent alcohol.
If wet weather is in the forecast, a little extra preparation goes a long way. Our guide to camping in the rain covers practical ways to keep your campsite, gear and cooking setup manageable when the weather turns.
What You Do Not Need to Buy Again for Camping
Camping gear marketing works hard to convince you everyday items need an outdoor version. Most do not. These come straight from the kitchen at home:
- A knife. Your chef knife with a blade guard beats most camping knife sets.
- A wooden spoon and a spatula. There is no camping version of stirring.
- A can opener. Take the one from the drawer and put it back when you get home.
- Seasonings, in small screw-top containers rather than a camp spice rack.
- Reusable food containers, for leftovers, prep and stacking in the cooler.
- A dish towel and a couple of dishcloths.
The exception is anything you regularly forget to put back. If you camp often, keeping a basic kitchen box permanently packed with inexpensive utensils, a can opener and other small essentials can save a lot of last-minute checking before each trip.
Useful Extras Once You Have the Basics
Once the ten are covered, these are the additions that actually get used:
- A camp coffee setup. If coffee is part of your morning routine, our guide to the best coffee makers for camping covers the different options for making a proper cup at camp.
- Reusable plates, bowls and cutlery, which beat paper plates on cost and cleanup
- A water container with a spigot, so hand washing does not mean a walk to the tap
- A camp kitchen organizer, or a plastic tote that lives packed between trips
- A folding table, but only if your campsite doesn’t provide one – it’s worth checking before you pack
None of these are essential to getting started, but they can make a camp kitchen more convenient once you know what works for the way you camp.
Browse Our Camping Kitchen Essentials
Want all 10 picks in one place? We’ve collected the camping kitchen essentials featured in this guide in our Amazon storefront, so you can easily browse the complete list.
As an Amazon Associate, we earn from qualifying purchases.
Camping Kitchen Essentials FAQ
What do you really need in a camping kitchen?
For car camping, a two-burner stove, one large skillet, a cutting board, long tongs, heat-resistant gloves, foil, an instant-read thermometer, a cooler thermometer and something to wash up in. That covers cooking, prep, food safety and cleanup. A camp Dutch oven is the worthwhile tenth piece if you want to bake or slow-cook over coals. Cutlery, a can opener, a knife and seasonings can all come from your kitchen at home.
Is cast iron worth taking camping?
For car camping, yes. It holds heat well, which keeps the temperature steady when cold food hits the pan and the wind is working against you, and it can go on a stove, a grill grate or directly onto coals. The trade-offs are weight, around 8 pounds for a 12-inch skillet, hand washing, and keeping the seasoning up. For backpacking it is far too heavy, and if your camp cooking is mostly boiling water, a lighter pan makes more sense.
Do I need a camp stove if I plan to cook over a fire?
A camp stove is one of the most useful pieces of camp cooking gear you can own, even if you enjoy cooking over a fire. Fires take time to build and burn down, the heat is uneven and hard to turn down, and wet wood can rule cooking out entirely. More importantly, fire restrictions can arrive at short notice and ban wood and charcoal fires. Gas stoves are commonly allowed in those situations because they can be shut off at a valve, but not always, so check the current restrictions with the land manager where you are camping.
How do you wash dishes while camping?
Scrape the food scraps into your trash bag first, then wash in a basin using a small amount of biodegradable soap and as little water as you can. Leave No Trace guidance is to carry the water at least 200 feet from any stream or lake, strain the dishwater to catch remaining food particles, pack those out, and scatter the strained water widely instead of dumping it in one place. If your campground provides a utility sink or a gray water station, use that. Some sites require gray water to be packed out, so check the local rules.
How do you organize a camp kitchen?
Split the campsite into five zones and keep them separate: cooking, food prep, cold storage, dry storage, and washing. Put the stove on a stable surface with wind protection, keep the cutting board at the other end of the table, keep the cooler shaded and closed with a thermometer inside, use one tote for dry food and another for cookware, and set up the wash basin away from where you are preparing food. Raw meat gets its own prep surface and sits at the bottom of the cooler so nothing can drip onto ready-to-eat food.
The Short Version
A practical camp kitchen is a small kit that gets used hard, not a large one that gets carried around. Buy the stove and the skillet first, add the safety and cleanup pieces because they are cheap and they are the ones that ruin trips, and let the Dutch oven wait until you actually want to bake at a campsite. Get those camping kitchen essentials right and the rest of the trip gets noticeably easier.