
28 Easy Camping Meals That Make Camp Cooking Simple
Camping can go horribly wrong around dinner time. You plan ambitious meals, then roll into the campsite just as the light starts fading, with a cooler full of raw ingredients and frantically searching for a spot to chop and prepare everything.
I’ve done exactly that, and it’s why I now plan easy camping meals and get as much of the work done as I can before leaving the house. Ten minutes with a knife in your own kitchen ahead of time at home buys you hours sitting by the fire.
So the twenty-eight meals below are sorted by how much work each one actually takes at the campsite, starting with the ones that need no cooking at all. Each comes with quantities, a cook time and the gear it needs, so you can look at an entry and know in about ten seconds whether it suits the evening you’re realistically going to have.
This post contains affiliate links. As an Amazon Associate, I earn from qualifying purchases. If you book or buy through these links, I may earn a small commission at no extra cost to you. This helps support Avid Campers and allows me to keep creating free outdoor content.
How to Plan Camping Meals Without Overthinking It
Work backward from the cooler rather than forward from the recipes. Fish, salad greens and anything that loses quality fastest go on the first night. Precooked and frozen meals sit underneath and get eaten later in the trip, once they have thawed. Shelf-stable food covers the last day, when nobody wants to make meal or cooking decisions. That order is about quality and convenience, not safety: perishable food is safe for as long as the cooler holds 40F (4.4C) or below, and no longer, whichever night of the trip it is.
The most useful thing you can add to a camp kitchen costs less than $10: a cooler thermometer sitting inside the cooler. Ice volume tells you nothing about temperature, and 40F is the line that matters. If you want the full packing method, our guide to how to keep food cold when camping covers coolers, dry ice and what to freeze before you leave.
Quantities below are for the servings stated. Scale them up rather than banking on leftovers, since leftovers only keep while the cooler stays cold enough, and they need reheating to 165F when you do use them.
💡 The two-hour window is shorter than you think
Perishable food shouldn’t sit out for more than two hours – or one hour when the temperature is above 90°F (32°C). Keep meat, dairy and other perishables in the cooler until you’re ready to use them.
No-Cook Camping Meals
Nothing in this section gets cooked at the campsite. A few involve boiling pasta or noodles at home first, which is the point: the work happens in a kitchen with a sink. These are what you want on arrival night, after a hike that ran late, or on an afternoon too hot to stand over a stove.
1. Mediterranean Tuna Wraps
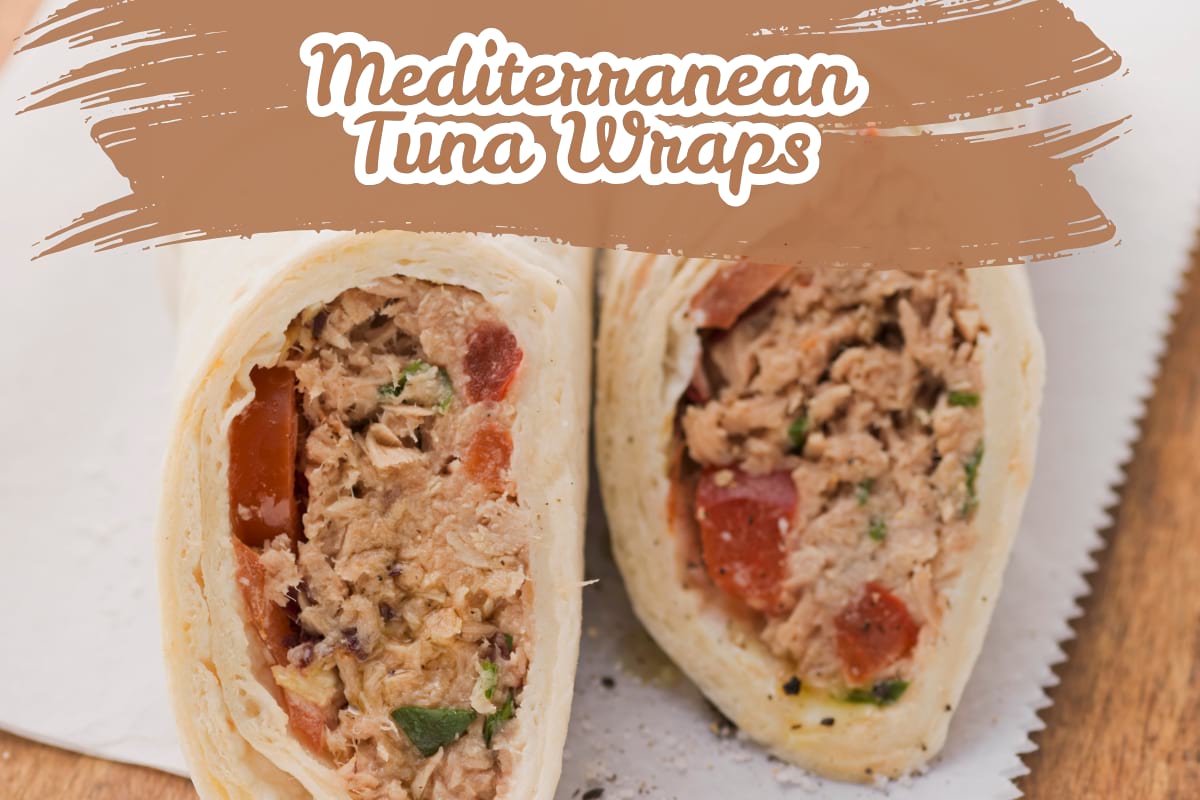
Time: 10 min · Serves: 4 · Gear: knife, bowl
You’ll need:
- 4 large flour tortillas
- Tuna, about 10 oz: 4 single-serve pouches (2.6 oz each), or 2 cans (5 oz each), drained
- 1 jar (12 oz) roasted red peppers, drained and sliced
- 1/2 cup pitted olives, roughly chopped
- 4 oz feta
- 1 lemon, 2 tbsp olive oil, black pepper
At camp: Flake the tuna into a bowl with the peppers, olives and crumbled feta. Squeeze over half the lemon, add the oil and plenty of pepper, and stir once. Pile down the middle of each tortilla, fold the bottom up and roll tight.
Camp tip: Pouch tuna beats canned here. There is no oil to drain, no sharp lid to deal with, and the pouches pack flat against the side of the cooler instead of taking up a corner.
Got more cooler space? Add some crisp salad leaves and a spoonful of Greek yoghurt, tzatziki, or your choice of sauce for extra freshness and creaminess. Finish with a squeeze of lemon and a pinch of oregano or a dash of your favorite seasoning.
2. Chicken Caesar Wraps
Time: 10 min · Serves: 4 · Gear: knife, bowl
You’ll need:
- 1 rotisserie chicken
- 4 large flour tortillas
- 1 large romaine heart, shredded
- 1/2 cup grated parmesan
- 1/2 cup bottled Caesar dressing
- Black pepper
At camp: Pull the meat off the chicken and shred it with your hands. Toss about half of it with the romaine, parmesan and dressing, then roll into the tortillas.
Camp tip: Buy the chicken on the drive in, and get it into the cooler right away at purchase. Half a bird makes the wraps and the other half carries a second meal the next day.
3. Cold Peanut Noodle Salad
Time: 20 min at home, 5 min at camp · Serves: 4 · Gear: bowl, tongs
You’ll need:
- 12 oz noodles (soba, rice or spaghetti)
- 1/2 cup peanut butter
- 1/4 cup soy sauce, 2 tbsp rice vinegar, 1 tbsp honey
- 2 carrots and 1 cucumber
- 1 lime, cilantro, 1/2 cup roasted peanuts
At home: Cook and drain the noodles. Whisk the peanut butter, soy, vinegar and honey with a few tablespoons of hot water until pourable, toss through the noodles, and chill in a sealed tub.
At camp: Grate or julienne the carrot and cucumber, fold through, and finish with lime, cilantro and peanuts.
Camp tip: Dress the noodles at home and add the fresh vegetables at camp. Dressed vegetables go limp overnight in a cooler; dressed noodles only improve.
4. Greek Chickpea Salad

Time: 15 min · Serves: 4 with pita · Gear: knife, large tub
You’ll need:
- 2 cans (15 oz each) chickpeas, drained
- 1 cucumber, 2 cups cherry tomatoes, 1/2 red onion
- 6 oz feta
- 1/2 cup olives
- 3 tbsp olive oil, 2 tbsp red wine vinegar, 1 tsp dried oregano
- 4 pita breads
At camp: Put the oil, vinegar and oregano in the bottom of the tub, then the chickpeas, then the chopped vegetables, with the feta and olives on top. Leave it layered until you eat, then toss and serve with pita.
Camp tip: This is the rare camp meal whose flavor improves overnight, so make double, as long as you have space in the cooler to keep it stored safely overnight at recommended temperature. Keeping the dressing at the bottom and the feta on top is what stops it turning to mush.
Got more cooler space? Add a spoonful of Greek yoghurt or tzatziki for that extra creamy punch.
5. Smoked Salmon Bagels

Time: 10 min · Serves: 4 · Gear: knife
You’ll need:
- 4 bagels
- 8 oz cream cheese
- 8 oz cold-smoked salmon
- 2 tbsp capers, 1/2 red onion, thinly sliced, and handful lettuce leaves
- 1 lemon, black pepper
At camp: Split and spread the bagels, layer on the lettuce, salmon, and finish with onion, capers, lemon and pepper.
Camp tip: Smoked salmon is perishable and stays safe only while the cooler is at 40F (4.4C) or below, so check the thermometer rather than relying on how long you’ve stored it for.
6. Deli Sub Bar
Time: 15 min · Serves: 4 to 6 · Gear: knife, board
You’ll need:
- 6 sub rolls or 2 baguettes
- 1 lb sliced deli meats, two or three kinds of your choice
- 8 oz sliced cheese
- 1 romaine heart, 2 tomatoes, jar of pickles
- Mustard and mayonnaise
At camp: Lay everything out on a board and let people build their own. Slice the tomatoes and shred the lettuce first so the queue moves.
Camp tip: The least clever meal here and consistently the most popular with a mixed group, because nobody has to eat around something they dislike. Keep the mayo in the cooler and bring it out only for assembly.
7. Hummus, Pepper and Artichoke Ciabatta
Time: 10 min · Serves: 4 · Gear: knife
You’ll need:
- 4 ciabatta rolls
- 1 cup hummus
- 1 jar (12 oz) roasted red peppers, drained
- 1 jar (6 oz) marinated artichokes, drained
- 2 handfuls baby spinach, olive oil, black pepper
At camp: Split the rolls, spread both sides with hummus, and layer in the peppers, artichokes and spinach. Press them under something heavy for a few minutes if you have the patience.
Camp tip: Jarred vegetables packed in oil are the no-cook shortcut worth building meals around. Unopened they need no cooler at all, and once opened they keep only while the cooler stays at 40F (4.4C) or below. They add far more flavor than fresh salad vegetables do.
8. Grazing Board Dinner
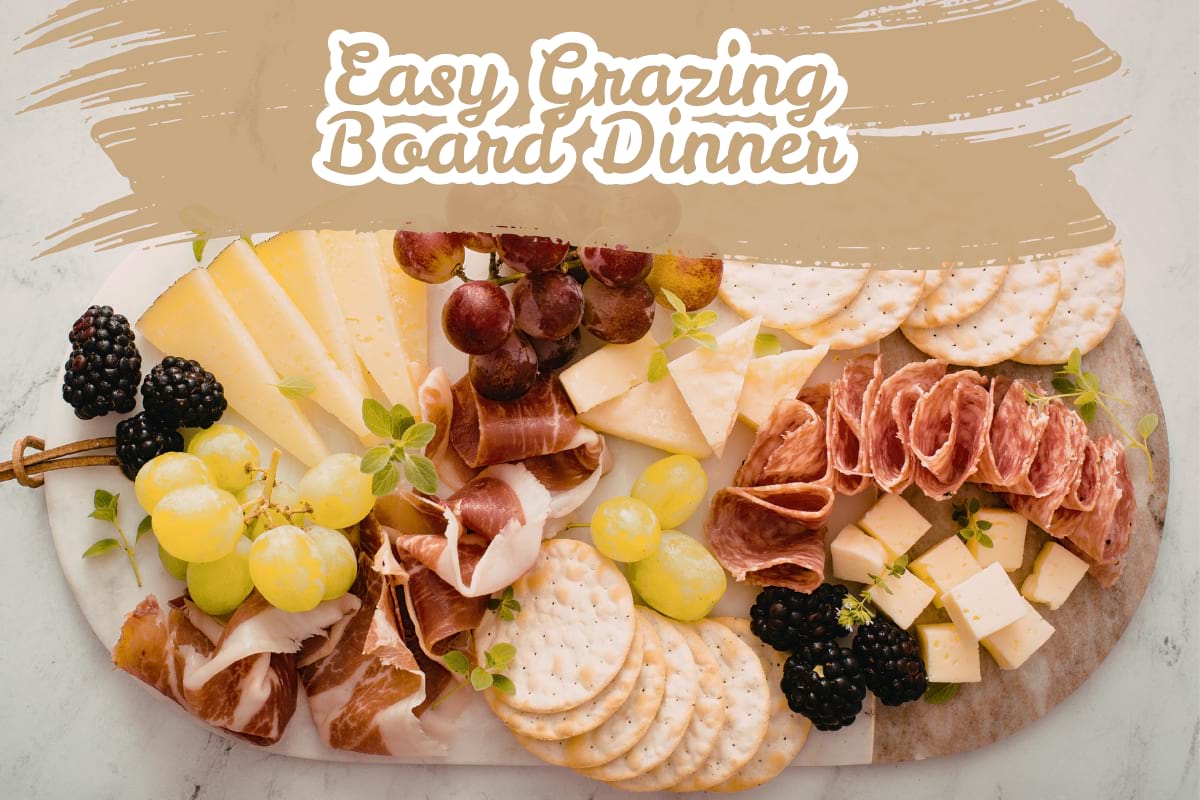
Time: 10 min · Serves: 4 · Gear: board, knife
You’ll need:
- 8 oz hard cheese, such as cheddar or manchego
- 6 oz dry-cured sausage
- 1 box crackers
- 1 cup grapes, 1 cup nuts, 1/2 cup olives
- 1 small jar chutney or pickle
At camp: Slice the cheese and sausage and spread everything across a board. That is the whole method.
Camp tip: Hard cheese and dry-cured sausage hold their texture and flavor better than most cooler food, which makes this an easy meal to hold back for a night when nobody wants to cook. They are still perishable, so they need the cooler at 40F (4.4C) or below like everything else, and no more than two hours out of it, one hour above 90F.
One-Pan Camping Dinners
One burner, one pan, one thing to wash. One burner, one pan, one thing to wash. A 12-inch cast iron skillet handles every recipe in this section and is one of the most useful pieces of camp cooking gear to bring along.
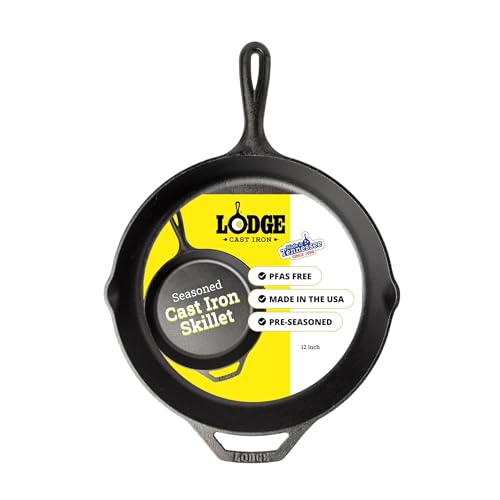
A versatile 12-inch cast iron skillet for campsite breakfasts, one-pot dinners and cooking over a camp stove, grill or campfire.
9. Skillet Campfire Nachos

Time: 15 min · Serves: 4 · Gear: 12-inch cast iron skillet with lid or foil
You’ll need:
- 1 large bag tortilla chips
- 1 lb ground beef browned at home
- 1 can (15 oz) black beans, drained
- 2 cups shredded cheese
- 1 jar salsa, 1 avocado, sour cream, scallions and roughly chopped tomatoes
At camp: Build two layers of chips, meat, beans and cheese in the skillet. Cover and set over low coals or the lowest burner setting for 8 to 10 minutes, until the cheese has melted. Add the salsa, avocado, tomatoes and sour cream after it comes off the heat.
Camp tip: Low heat, always. High heat scorches the bottom layer of chips long before the top layer melts, and there is no rescuing a skillet of burnt chips.
10. Sausage, Pepper and Potato Hash
Time: 25 min · Serves: 4 · Gear: skillet
You’ll need:
- 1.5 lb baby potatoes, parboiled at home and halved
- 1 lb smoked sausage, sliced
- 2 bell peppers and 1 onion, sliced
- 2 tbsp oil, 1 tsp smoked paprika, salt and pepper
At camp: Brown the sausage in the oil and set it aside. Cook the peppers and onion for 5 minutes, then add the potatoes cut side down and leave them alone for 8 minutes so they crust. Return the sausage, add the paprika and toss.
Camp tip: Parboiling the potatoes at home cuts the cook time roughly in half and saves a noticeable amount of burner fuel. Do it while you are cooking something else the night before you leave.
11. Chorizo and Black Bean Rice

Time: 20 min · Serves: 4 · Gear: skillet
You’ll need:
- 8 oz cured chorizo, diced
- 1 large onion, diced
- 1 can (15 oz) black beans, drained
- 1 can (14.5 oz) diced tomatoes
- 2 pouches (8.8 oz each) precooked rice
- 1 tsp cumin, 1 lime
At camp: Render the chorizo over medium heat until the fat runs orange, add the onion and cumin for 4 minutes, then the beans and tomatoes and simmer 5 minutes. Stir in the rice, heat through, and finish with lime.
Camp tip: Precooked rice pouches cost a couple of dollars more and free up a burner, a lid and ten minutes of timing you would otherwise have to babysit.
12. Skillet Gnocchi with Pesto and Tomatoes
Time: 12 min · Serves: 3 · Gear: skillet
You’ll need:
- 1 lb shelf-stable gnocchi
- 3 tbsp olive oil
- 2 cups cherry tomatoes, halved
- 1/2 cup pesto
- Parmesan, salt and pepper
At camp: Fry the gnocchi in the oil over medium-high heat for 6 to 8 minutes, turning occasionally, until golden and crisp at the edges. Add the tomatoes for 3 minutes until they collapse, then stir through the pesto off the heat and grate over the parmesan.
Camp tip: Shelf-stable gnocchi fries straight from the packet with no boiling and no draining, so there is no pot of hot water to dispose of. Everything except the pesto keeps out of the cooler, which makes this a strong last-night option.
13. Blackened Fish Tacos
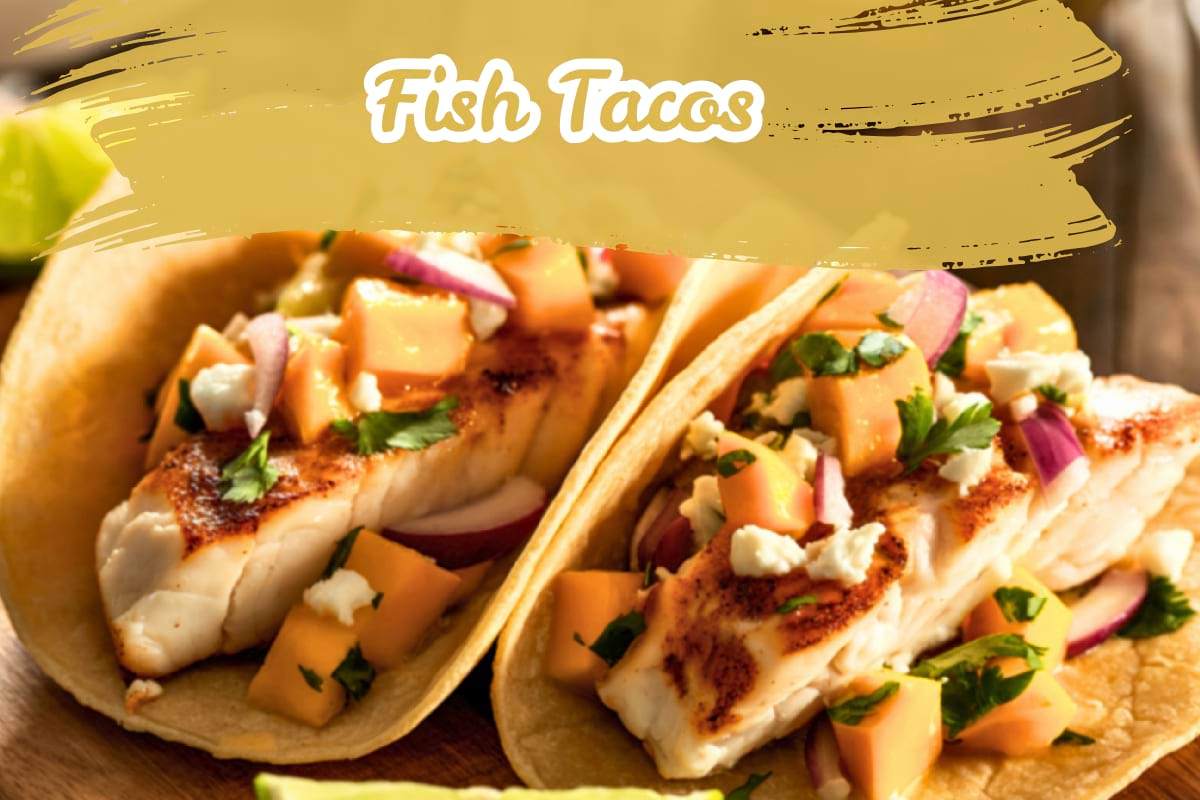
Time: 15 min · Serves: 4 · Gear: skillet
You’ll need:
- 1.5 lb firm white fish fillets
- 2 tsp paprika, 2 tsp cumin, 1 tsp garlic powder, 1/2 tsp cayenne, 1 tsp salt
- 8 small tortillas
- 3 cups shredded cabbage
- 1/2 cup sour cream and 1 lime, 2 tbsp oil
At camp: Mix the spices and rub them over the fish. Sear in hot oil for about 3 minutes a side, until it reaches 145F and flakes cleanly. Break it into pieces, warm the tortillas in the same pan, and top with cabbage and lime-spiked sour cream.
Camp tip: Fish loses quality faster than anything else in the cooler, so cook it early in the trip while it is at its best, and keep it at 40F (4.4C) or below until it hits the pan. It is also the fastest protein you can put on a plate, which makes it a strong arrival-night choice.
14. Camp Smash Burgers
Time: 15 min · Serves: 4 · Gear: griddle or heavy skillet, stiff spatula
You’ll need:
- 1.5 lb ground beef, formed into 8 loose balls
- 8 slices cheese
- 8 small buns
- 1 onion, sliced paper thin
- Pickles, mustard, salt and pepper
At camp: Get the pan very hot. Press each ball flat with the spatula for 30 seconds, season, and cook about 2 minutes until the edges are lacy. Flip, add cheese, and give it another minute or two to 160F.
Camp tip: Form and season the balls at home, stack them with squares of parchment between, and freeze them flat. They help chill the cooler on the drive out. Thawing time varies with cooler temperature and how deeply they are packed.
15. Camp Stove Pad Thai
Time: 15 min · Serves: 3 · Gear: skillet
You’ll need:
- 1 boxed pad thai kit (noodles and sauce)
- 8 oz shrimp, diced chicken or firm tofu
- 2 eggs
- 3 scallions, 1/2 cup roasted peanuts, 1 lime
- 2 tbsp oil
At camp: Soak the noodles as the kit directs. Cook the protein in hot oil, push it to one side, scramble the eggs in the space, then add the drained noodles and sauce and toss everything for 2 minutes. Finish with scallions, peanuts and lime.
Camp tip: A kit is worth it here for a specific reason: a decent pad thai sauce needs six ingredients you would otherwise carry as six small bottles, all of which can easily leak.
16. Skillet Shakshuka
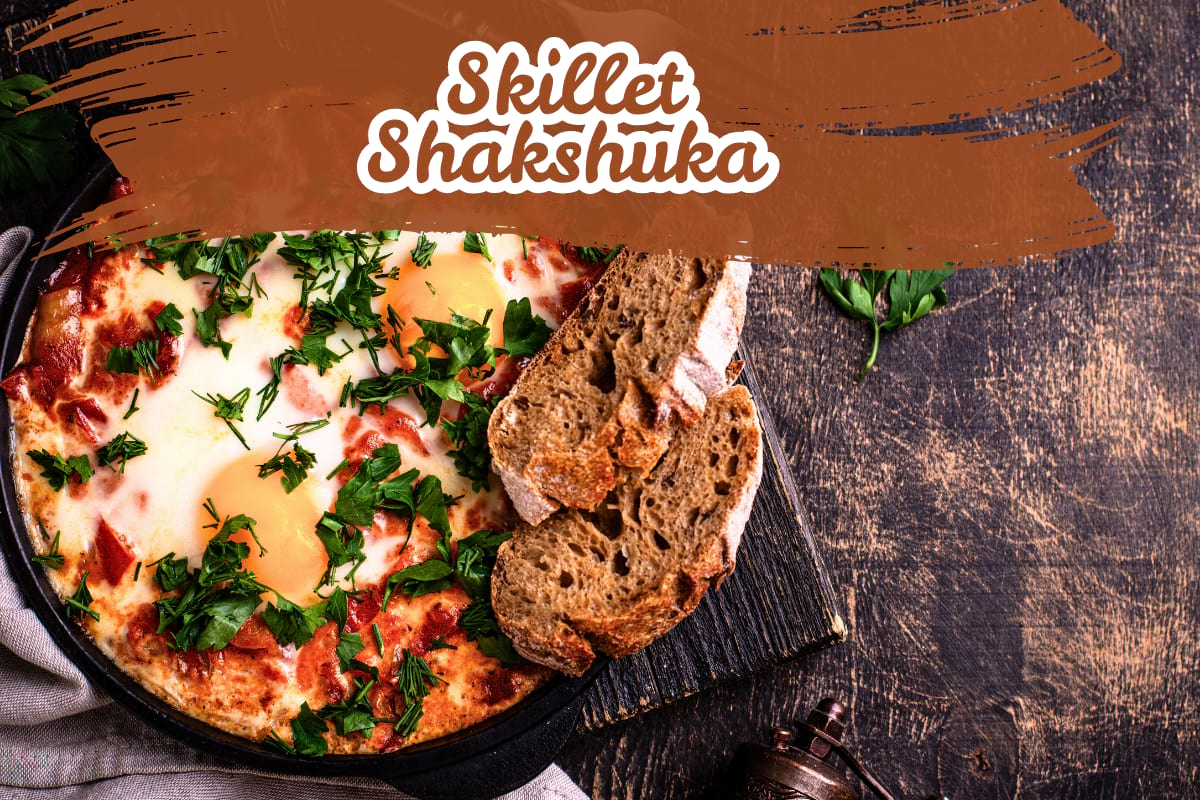
Time: 20 min · Serves: 4 · Gear: skillet with lid
You’ll need:
- 2 tbsp olive oil
- 1 large onion and 1 red pepper, sliced
- 2 cloves garlic, 1 tsp cumin, 1 tsp paprika
- 2 cans (14.5 oz each) chopped tomatoes
- 6 eggs
- Crusty bread, feta if you have it
At camp: Soften the onion and pepper for 6 minutes, add the garlic and spices for a minute, then the tomatoes. Reduce for 8 minutes until thick, make six wells, crack in the eggs, and cover for 5 to 7 minutes until the whites are set. Crumble over the feta if you brought it. Egg dishes are done at 160F.
Camp tip: Nothing in this except the eggs needs refrigeration, so it survives to the end of a trip better than any other hot meal here. Serve with bread for scooping and there is nothing to wash but the skillet.
Foil Packet Meals
Foil packets go straight onto a bed of coals, need no pan, and leave you with nothing to scrub. Quantities below are per packet, so multiply by the number of people. Use heavy-duty foil cut into sheets roughly 12 by 18 inches, seal with a little air space inside so the food steams, and cook over raked-flat embers rather than flames.

A practical choice for foil packet meals and campfire cooking. The heavy-duty foil is less prone to tearing when wrapping food or cooking around the grill and coals.
17. Shrimp Boil Packets
Time: 20 min · Makes: 1 packet · Gear: heavy-duty foil, long tongs
You’ll need:
- 6 oz raw shrimp, peeled
- 3 oz andouille sausage, sliced
- 1 ear corn, cut into 3 rounds
- 4 baby potatoes, parboiled at home and halved
- 1 tbsp butter, 1 tsp Old Bay seasoning
At camp: Pile everything onto the foil, dot with butter and dust with the seasoning. Seal and cook over hot coals for 15 to 20 minutes, turning once, until the shrimp are opaque throughout.
Camp tip: Parboil the potatoes at home. Raw potato needs roughly twice as long as shrimp, so without that step you get hard potatoes and rubber shrimp in the same packet.
18. BBQ Chicken and Potato Packets
Time: 35 min · Makes: 1 packet · Gear: heavy-duty foil, long tongs
You’ll need:
- 6 oz chicken thigh, diced
- 5 baby potatoes, quartered small
- 1/4 red onion, sliced
- 3 tbsp barbecue sauce, 1 tsp oil, salt and pepper
At camp: Toss everything together, seal the packet, and cook over coals for 30 to 40 minutes, turning at the halfway point. Open one, check the thickest piece of chicken reads 165F, and reseal it for longer if it does not.
Camp tip: Use thigh, not breast. Thigh meat stays moist well past 165F, and a coal bed is not a precise instrument, so the forgiving cut is the right one.

19. Cheeseburger Foil Packets
Time: 30 min · Makes: 1 packet · Gear: heavy-duty foil, long tongs
You’ll need:
- 1/4 lb ground beef, formed into a seasoned patty
- 1 medium potato, sliced thin
- 1/4 onion, sliced
- 1 slice cheese, 1 tsp butter, salt and pepper
At camp: Lay the potato and onion down first, sit the patty on top, seal, and cook 25 to 35 minutes over coals, turning once. Open, check the beef reads 160F, add the cheese and reseal for two minutes.
Camp tip: Sitting the patty on the vegetables rather than the foil keeps it off the hottest surface and stops the base burning while the middle is still raw.
20. Kielbasa and Cabbage Packets
Time: 30 min · Makes: 1 packet · Gear: heavy-duty foil, long tongs
You’ll need:
- 5 oz kielbasa, sliced thick
- 1/4 small cabbage, cut into wedges
- 1/4 onion, sliced
- 1 tbsp butter, 1/2 tsp caraway seeds, black pepper
At camp: Pack it all in, seal, and cook over coals for 25 to 35 minutes, turning once. The kielbasa is already cooked, so you are only waiting on the cabbage to soften.
Camp tip: Cabbage is the most underrated foil packet vegetable. It steams down sweet and silky over half an hour, where zucchini collapses into water in fifteen minutes.
21. Honey Garlic Salmon Packets
Time: 15 min · Makes: 1 packet · Gear: heavy-duty foil, long tongs
You’ll need:
- 6 oz salmon fillet
- 4 oz green beans, trimmed
- 1 tbsp honey, 1 tsp soy sauce, 1 clove garlic, sliced
- 1 tsp butter
At camp: Lay the beans down, sit the salmon on top, spoon over the honey, soy and garlic, seal, and cook 12 to 18 minutes over coals. It is done at 145F.
Camp tip: Add lemon after you open the packet, never inside it. Acid and salt break down the protective oxide layer on aluminum foil, which leaves a metallic taste and pits the foil. Fish packets also cook in about half the time of potato-heavy ones, so give them their own corner of the coal bed.
Make-Ahead Meals You Reheat at Camp
Cooked at home, frozen flat, and reheated in fifteen minutes at the campsite. Frozen bags help chill the cooler on the drive out. How long they take to thaw depends on cooler temperature and packing, so plan around what has actually thawed rather than a fixed night, and keep them at 40F (4.4C) or below while they do.
22. Beef Chili
Time: 15 min to reheat · Serves: 4 to 6 · Gear: pot
You’ll need:
- 1.5 lb ground beef, 1 onion, 2 cloves garlic
- 2 tbsp chili powder, 1 tbsp cumin, 1 tsp oregano
- 1 can (15 oz) kidney beans and 1 can (15 oz) black beans
- 1 can (28 oz) chopped tomatoes, 1 cup stock
- At camp: shredded cheese, sour cream, tortilla chips
At home: Brown the beef and onion, add the spices, then the beans, tomatoes and stock, and simmer 40 minutes until thick. Cool fully, then freeze flat in two zip bags.
At camp: Empty a bag into a pot with a splash of water and reheat, stirring, until it reaches 165F throughout. About 15 minutes from thawed.
Camp tip: Make it noticeably thicker than you would at home. A loose chili separates as it freezes and looks wrong when it comes back, even though it tastes fine.
23. Pulled Pork
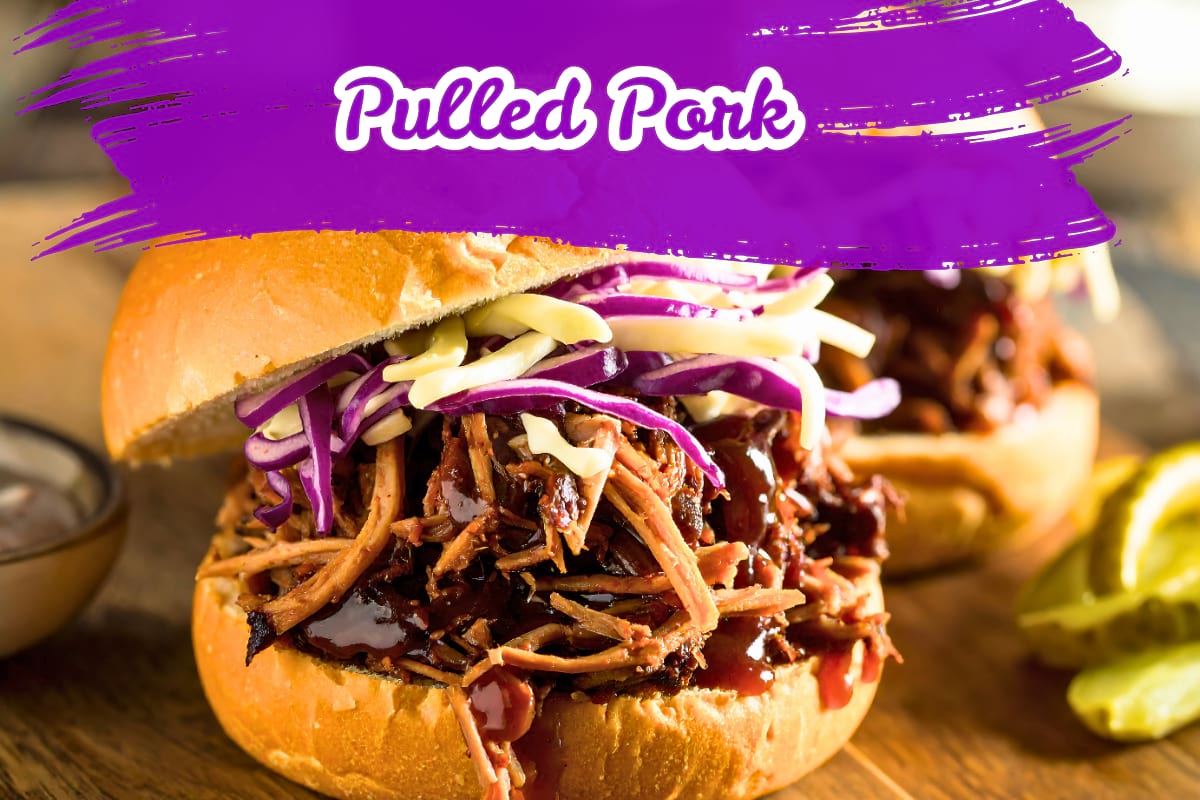
Time: 15 min to reheat · Serves: 6 to 8 · Gear: pot
You’ll need:
- 4 lb pork shoulder
- 2 tbsp dry rub (paprika, brown sugar, salt, garlic powder)
- 1 cup stock
- At camp: 8 buns, barbecue sauce, coleslaw
At home: Rub the shoulder, cook it low and slow until it shreds easily, then pull it and pack it into bags with its cooking juices. Freeze flat.
At camp: Reheat in a pot with a splash of water to 165F and pile into buns with slaw and add barbecue sauce to taste.
Camp tip: Freeze it in the juices rather than drained. Dry-frozen pulled pork reheats stringy, and there is no fixing it once it is in the pot.
24. Chicken Tikka Masala
Time: 15 min to reheat · Serves: 4 · Gear: pot
You’ll need:
- 1.5 lb chicken thigh, diced
- 1 onion, 3 tbsp tikka masala paste
- 1 can (14.5 oz) chopped tomatoes, 1/2 cup cream or coconut milk
- At camp: 2 pouches (8.8 oz each) precooked rice, naan, a small pot of yogurt
At home: Cook the onion and paste, add the chicken, then the tomatoes, and simmer 25 minutes before stirring in the cream. Cool and freeze flat.
At camp: Reheat to 165F with a splash of water. Warm the naan on the pan lid and heat the rice pouches in the same pot at the end.
Camp tip: If the sauce looks split coming out of the bag, it will come back together as it heats. A spoonful of yogurt stirred in at the end finishes the job.
25. Marinated Chicken Kebabs
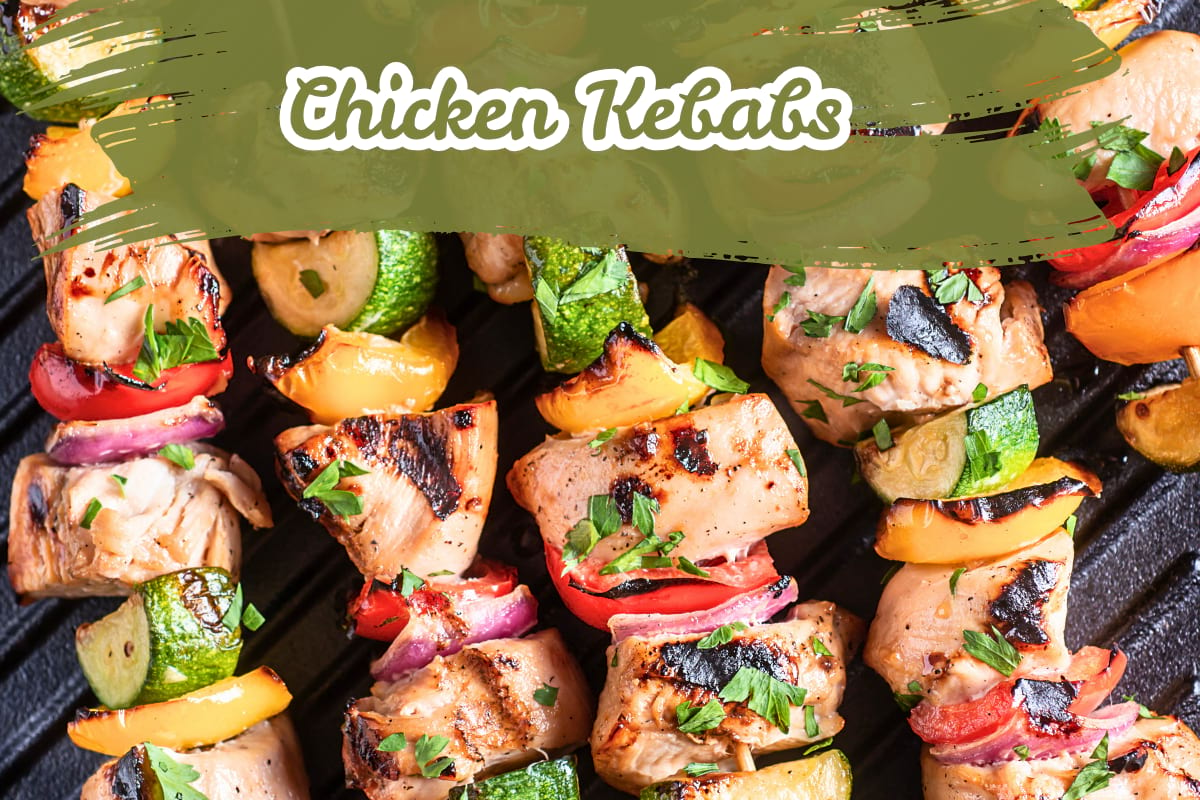
Time: 12 min · Serves: 4 · Gear: 8 skewers, grill grate
You’ll need:
- 1.5 lb chicken thigh, cut into 1-inch cubes
- 2 bell peppers and 1 red onion, cut into squares
- 1/4 cup olive oil, 2 tbsp lemon juice, 2 cloves garlic, 1 tsp oregano, 1 tsp salt
- At camp: 4 flatbreads, yogurt or hot sauce
At home: Marinate the chicken for at least an hour, thread the skewers alternating chicken and vegetables, and freeze them flat in a bag.
At camp: Grill over coals for 10 to 12 minutes, turning every few minutes, until the chicken reaches 165F. Serve in flatbread.
Camp tip: Thread the skewers at home. A picnic table in fading light with cold hands is a genuinely miserable place to do it, and it costs you nothing to do it in a kitchen.
Camp Desserts
Dessert at camp is mostly an excuse to sit by the fire for another half hour, so these three are deliberately the simplest versions. They all run on the coals or the burner you already used for dinner.
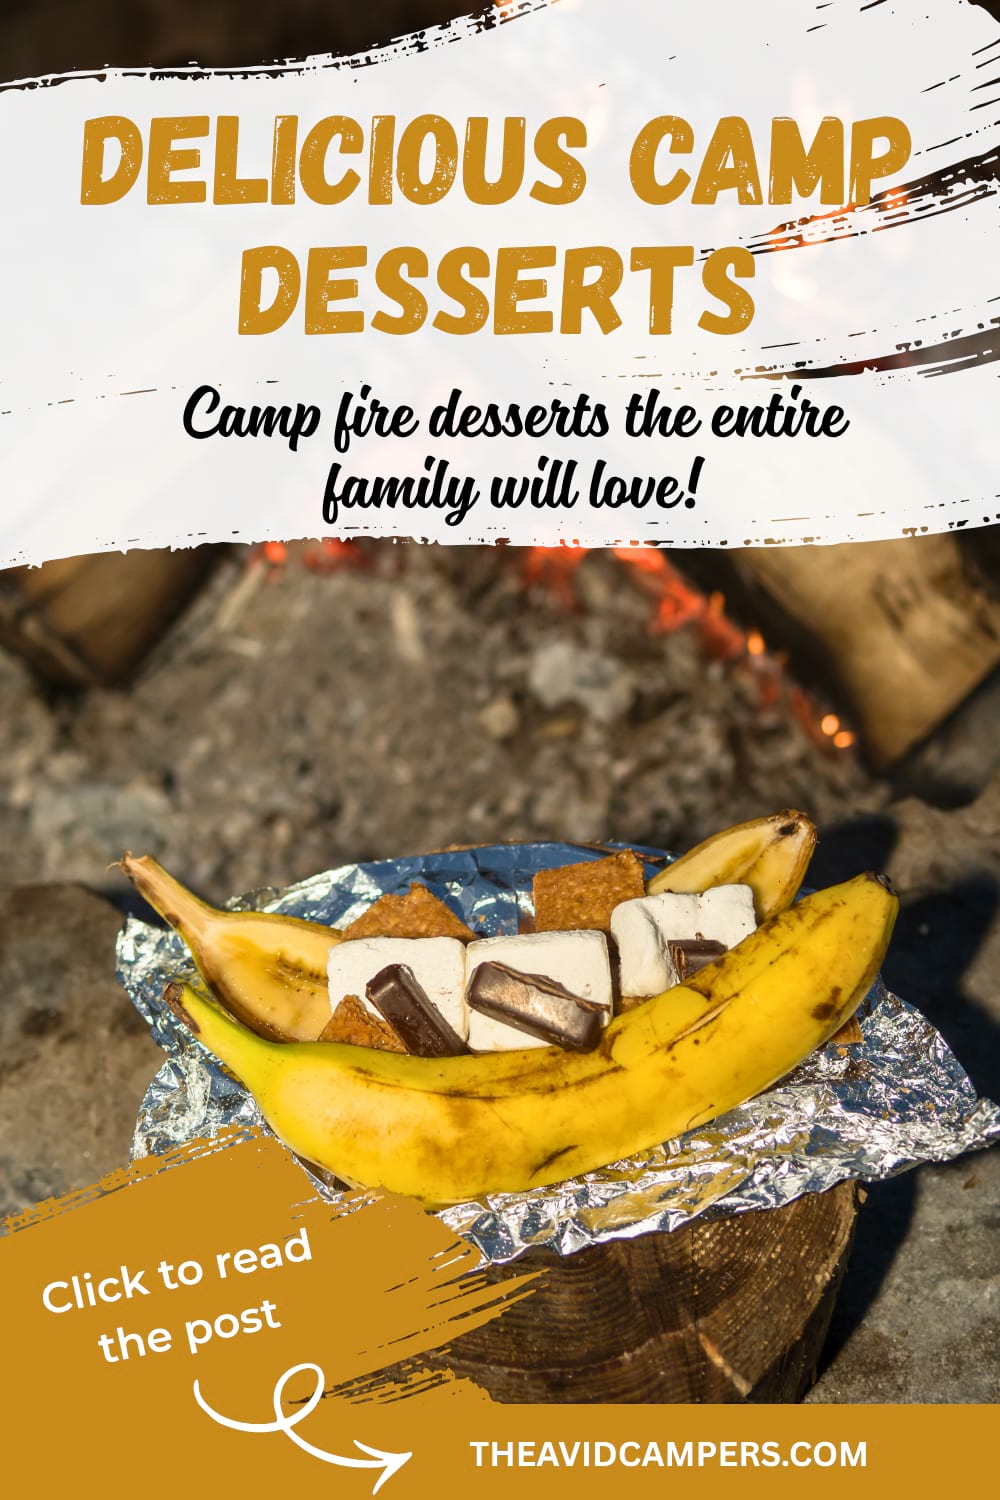
26. Campfire Banana Boats
Time: 10 min · Makes: 1 per banana · Gear: foil
You’ll need:
- 1 banana per person, unpeeled
- 2 tbsp chocolate chips
- 1/4 cup mini marshmallows
At camp: Slit the banana lengthwise through the skin without cutting all the way through, push in the chocolate and marshmallows, wrap in foil and set on the coals for 8 to 10 minutes until everything has melted. Eat it out of the skin with a spoon.
Camp tip: Pre-cut the foil squares at home. This is the dessert children insist on assembling themselves, and it goes much better if the only sharp part is already done.
27. Grilled Pineapple with Cinnamon Sugar
Time: 10 min · Serves: 4 · Gear: grill grate or skillet
You’ll need:
- 1 pineapple, cut into 8 rings, or 1 can (20 oz) pineapple rings, drained
- 2 tbsp brown sugar
- 1 tsp ground cinnamon
- 1 tbsp melted butter
At camp: Brush the rings with butter, dust with the cinnamon sugar, and grill 3 to 4 minutes a side until they take dark lines and the sugar caramelizes.
Camp tip: Canned rings work fine and need about half the time, which makes them the better choice outside pineapple season and one less thing to carry a knife for.
28. Skillet Cookie
Time: 20 min · Serves: 4 to 6 · Gear: cast iron skillet with lid or foil
You’ll need:
- 1 tube (16 oz) refrigerated cookie dough
- 1 tsp butter for the pan
At camp: Grease the skillet, press the dough in evenly, cover, and set over low coals or the lowest burner for 15 to 20 minutes, until the edges are set and the middle is still soft.
Camp tip: Keep it covered or the top never cooks, and keep the heat low or the base burns. Serve it straight from the pan with spoons rather than trying to cut slices.
The Camp Kitchen Kit That Makes All of This Easier

A fast instant-read thermometer for checking meat and other foods at camp, taking the guesswork out of knowing when chicken, burgers and other campsite meals are safely cooked.
You don’t need much, but the few things you do need matter more than the recipes themselves.
A 10 or 12-inch cast iron skillet handles every hot meal here. Heavy-duty aluminum foil is worth using for foil-packet meals because it’s less likely to tear when you’re wrapping food or cooking around a grill or campfire. An instant-read thermometer is the difference between guessing and knowing on chicken and ground beef, both of which give you no reliable visual cue. Long tongs and a heat-resistant glove keep your hands out of the fire, and a collapsible wash basin with a mesh strainer turns cleanup into a five-minute job.
Camp kitchen essentials
Seven things that cover every meal on this page. Get the basics right and the rest of camp cooking gets a whole lot easier.
- 12-inch cast iron skillet with lid: cooks every hot meal in this article, and holds heat when the wind picks up in a way thin steel does not
- Heavy-duty aluminum foil: The extra strength is useful for foil-packet meals and cooking around the grill or campfire, where thinner foil can tear more easily
- Instant-read food thermometer: the only way to check 160F on ground beef or 165F on chicken, neither of which gives you a reliable visual cue
- 12 & 17-inch grill tongs: long enough to turn foil packets on the coals without leaning over the fire
- Heat-resistant grill gloves: for lifting a cast iron skillet off the coals
- Collapsible wash basin with a mesh strainer: turns washing up into a five-minute job and catches the food scraps you need to pack out
- Cooler fridge thermometer: costs a few dollars and tells you whether the cooler is actually at 40F (4.4C), which no amount of ice can confirm
Paid links. As an Amazon Associate I earn from qualifying purchases, at no extra cost to you.
💡 Fire bans do not end camp cooking
Fire restrictions are set by the agency or authority managing the land, and the rules vary by location. Stage 2 restrictions commonly prohibit campfires, charcoal and wood-burning stoves while still allowing certain propane or liquid-fuel stoves that can be switched off. That means many of the stove-top recipes here may still be an option even when campfires aren’t. Always check the current restrictions for your specific campground or public land before you leave – and follow the requirements for approved equipment and where it can be used.
Cooking and Cleaning Without Wrecking the Site
Scrape plates and cookware into a trash bag before washing. When washing facilities aren’t provided, keep dishwashing well away from streams, lakes and other water sources, use only a small amount of biodegradable soap, and strain food scraps from the dishwater so they can be packed out with your trash. Dispose of the strained water according to the rules for the campground or area where you’re staying.
Keeping food scraps out of the campsite matters just as much as cleaning the cookware. Pack out everything you brought in, store food securely between meals, and don’t leave scraps or cooking residue around camp that could attract wildlife.
Camping Food FAQs
What are the easiest meals to make while camping?
The ones with no cooking at the campsite: wraps, chickpea and noodle salads, and deli boards you assemble in ten minutes. After that, one-pan skillet dinners are the next step up, because they need a single burner and leave you with one thing to wash.
How do I plan camping meals for a weekend?
Plan backward from your cooler. Put the fresh, fastest-spoiling food on Friday night and Saturday morning, move frozen and precooked meals to Saturday night, and leave shelf-stable food for Sunday. That way you are not relying on ice that has been melting for two days.
How long can camping food stay in a cooler?
As long as the cooler holds at or below 40F, which is why a cheap fridge thermometer inside is worth more than a bigger bag of ice. Once perishable food comes out of the cooler, the USDA gives you two hours before it should go back or be thrown out, and one hour if it is above 90F outside.
What camping meals do not need a cooler at all?
Skillet gnocchi with pesto, pasta with jarred sauce, couscous with pouch tuna, and instant rice with canned beans. Hard cheeses and dry-cured sausage also last far longer unrefrigerated than most people assume, though they are still best kept cold while the cooler is working.
Can I cook these meals if there is a campfire ban?
Most of them, yes. Fire restrictions vary by land manager, but at Stage 2 wood and charcoal fires are typically banned while propane and liquid fuel stoves with a shut-off valve are usually still allowed. That rules out the five foil packets and leaves every other recipe here intact. Check the current order with whoever manages the land before you go.
How much food should I pack per person per day?
For a car camping weekend, plan three meals and two snacks per person per day, and expect appetites to run higher than at home after a day outdoors. The more useful planning number is meals rather than weight: build a menu of specific dishes, shop from that list, and you avoid the cooler full of ingredients with no plan attached.